Prerequisites - installing WSL
If you don't have a Linux box for running your Genesis platform, you can use Windows Subsystem for Linux (WSL2) to install a Linux environment on your Windows machine.
The Windows Subsystem for Linux enables you to run a GNU/Linux environment - including most command-line tools, utilities, and applications - directly on Windows, unmodified, without the overhead of a virtual machine or dual-boot setup.
In short, if your development environment is Windows, we recommend installing WSL2.
The recommended Linux OS is CentOS7. Here is how to set it up.
Setting up
Install Windows Terminal
If you haven’t already, please install Windows Terminal. This provides a tabbed single Window from which you can open different command line tools.
Install WSL2
Your Windows install must be 2004+ (2020 May feature release or higher).
If you have previously enabled WSL, you need to set the default version to 2 and (optionally) convert existing distros:
> wsl -l -v
  NAME      STATE           VERSION
* Ubuntu    Stopped         1
> wsl --set-default-version 2
For information on key differences with WSL 2 please visit https://aka.ms/wsl2
> wsl --set-version Ubuntu 2
Conversion in progress, this may take a few minutes...
For information on key differences with WSL 2 please visit https://aka.ms/wsl2
Conversion complete.
> wsl -l -v
  NAME      STATE           VERSION
* Ubuntu    Stopped         2
Install Ubuntu
Available in the Microsoft App store, the Ubuntu app utilises WSL2 and enables you to open an Ubuntu terminal, which helps with Microsoft's guide on installing CentOS7 (in the section below).
Install Rancher Desktop for Windows
Later on, you are going to need Docker in order to start your database. Also, depending on which route you choose, you might want Docker in order to Install CentOS7.
For instructions on how to install, see the Rancher documentation. For a download, click here.
Ensure that you have the WSL2 integration enabled and that you have enabled integration with your CentOS distribution. This enables you to access the Docker command, as well as any Docker container from any of the integrated distros, as well as from Windows.
To check this setting, open the Rancher Desktop, then go to File > Preference > WSL.
Since we are going to use dockered containers, you should check the session File > Preference > Container Engine and check dockered (moby)
Install CentOS7 for WSL2
WSL distributions can be found easily at various locations on the web. For instance, here is a prebuilt WSL CentOS7 distro.
To install this distro, unzip and execute the .exe
For an alternative and expedient way to install CentOS7, you can use the Microsoft article below in order to build a CentOS distro from a Docker image.
Note that you want to install CentOS7, whereas the microsoft article below focuses on CentOS latest.
Replace
# docker run -t centos bash ls/
with
# docker run -t centos:centos7 bash ls/
for the third step under Export the tar from a container.
You can find the Microsoft article to install CentOS here.
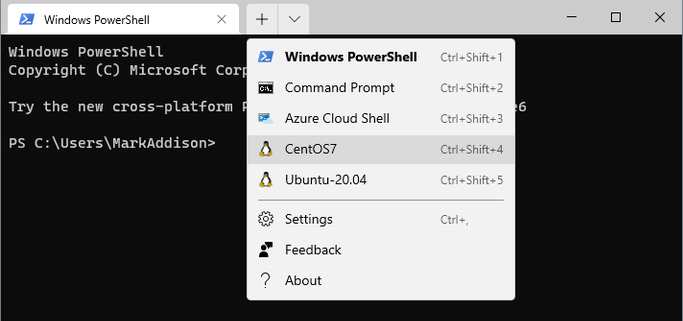
Once you have installed CentOS, close your Windows Terminal then reopen it. Note the new entry in the drop-down menu:
Next, update CentOS by running:
yum check-update
yum update
Prepare CentOS for Genesis
- Install package group:
yum groupinstall base
- In CentOS, install Java 17 or scp jdk from local binaries folder and install:
sudo yum -y install wget vim
wget https://download.oracle.com/java/17/latest/jdk-17_linux-x64_bin.rpm
sudo yum -y install ./jdk-17_linux-x64_bin.rpm
Once you have set this up, it is a good idea to export the distribution:
wsl --export CentOS7 centos.backup
You can then import it again under a different name. This allows you to have multiple distributions for different projects, for example, or for running Intellij.
Copying files between Windows and WSL
From WSL, your Windows drives are available from /mnt/${driveLetter}:
# pwd
/mnt
# ll
total 0
drwxrwxrwx 1 root root  512 Aug  8 12:48 c
drwxrwxrwx 1 root root 4096 Aug 14 08:50 d
drwxrwxrwt 5 root root  100 Aug 14 10:16 wsl
#
To access your WSL distros from Windows, open Windows Explorer and search ** \\wsl$\ ** for Windows 10 or ** \\wsl.localhost\ ** for Windows 11.
Windows Firewall set-up
If you are using Windows Firewall, you need to allow smooth network communication between your WSL distros and Windows.
First, get the network range for your WSL network switch; run ipconfig.exe as admin in PowerShell and look for WSL:
Ethernet adapter vEthernet (WSL):

   Connection-specific DNS Suffix  . :
   Link-local IPv6 Address . . . . . : fe80::6928:38ea:1eb7:84bc%43
   IPv4 Address. . . . . . . . . . . : 172.28.224.1
   Subnet Mask . . . . . . . . . . . : 255.255.240.0
   Default Gateway . . . . . . . . . :
Run the following command as admin so your firewall will not block inbound traffic from your WSL instances:
New-NetFirewallRule -DisplayName "WSL" -Direction Inbound -InterfaceAlias "vEthernet (WSL)" -Action Allow
Setting up a database
For learning purposes, you can use the default H2 database. For any serious development, you need to set one of the other database technologies supported by the platform.
Running Postgres from Docker
Running Postgres from Docker is very simple:
docker run -tid -p 5432:5432 -e POSTGRES_PASSWORD=docker -e PGDATA=/tmp postgres:12.6-alpine -c shared_buffers=80MB -c max_connections=250
This downloads and runs a Postgres image for version 12.6. Other versions are available; for more details see here. For version 10, change 12.6-alpine to 10.16-alpine.
To connect, use this JDBC URL:
jdbc:postgresql://localhost:5432/?user=postgres&password=docker
In your genesis-system-definition.kts file, set DbLayer=SQL and set DbHost with above JDBC URL
Running MSSQL from Docker
Run the following Docker command:
docker run -e "ACCEPT_EULA=Y" -e "SA_PASSWORD=Docker@111" -p 1433:1433 -d mcr.microsoft.com/mssql/server:2019-latest
This downloads and runs an MSSQL image for version 2019-latest. Other versions are available; for more details see here.
To connect, use this JDBC URL:
jdbc:sqlserver://localhost:1433;trustServerCertificate=true;database=master;user=sa;password=Docker@111
In your genesis-system-definition.kts file, set DbLayer=SQL and set DbHost with above JDBC URL
Installing FDB
As root (note, replace alpha with the application user set up):
useradd alpha
usermod -aG wheel alpha
Then...
rpm -Uvhi https://github.com/apple/foundationdb/releases/download/6.3.23/foundationdb-clients-6.3.23-1.el7.x86_64.rpm
rpm -Uvhi https://github.com/apple/foundationdb/releases/download/6.3.23/foundationdb-server-6.3.23-1.el7.x86_64.rpm
mv /usr/bin/systemctl /usr/bin/systemctl.old
curl https://raw.githubusercontent.com/gdraheim/docker-systemctl-replacement/master/files/docker/systemctl.py > /usr/bin/systemctl
chmod +x /usr/bin/systemctl
systemctl start foundationdb
fdbcli --exec "configure new single ssd ; status"
systemctl enable foundationdb
Then, to check if it's running:
systemctl status foundationdb
Using H2
This set-up is not recommended for production environments or serious development.
You can use the default H2 database for basic development. This solution creates an H2 file-based database in the same environment where your app is running. The database is initiated by JDBC and does not require additional set-up.
To use H2, use this JDBC URL, substituting your own path name:
jdbc:h2:file:~/run/path/to/h2;AUTO_SERVER=TRUE
In your genesis-system-definition.kts file, set DbLayer=SQL, DictionarySource=FILE and DbQuotedIdentifiers=true.