Learn the basics - a very simple introduction
What is the Genesis platform?
The Genesis platform enables you to design, build and run applications for the financial markets.
Your application has:
- a back end - a server - that provides a database and the business logic that handles the various events that occur when the application is running
- a front end that enables users to view data and interact with information in required ways
Let's spend some time looking at the back end.
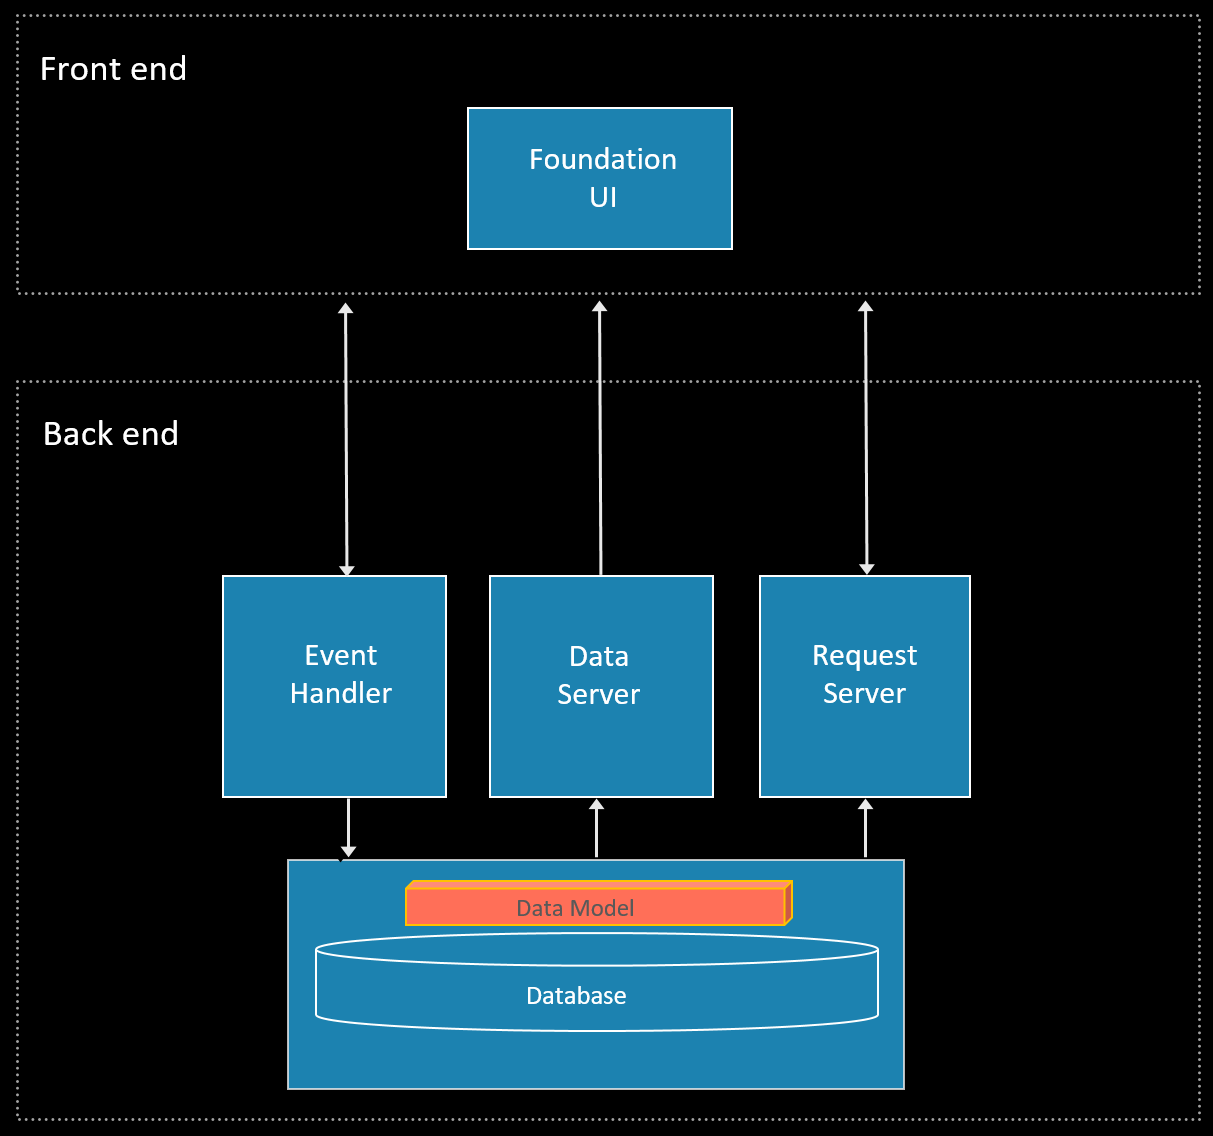
The simplest way of thinking about the back end is that it is a database surrounded by a number of modules. The essential modules are:
- the Data Server (real-time data)
- the Request Server (static data)
- the Event Handler (interacts with other modules in order to make changes to the database)
These elements on their own can create a complex and effective back end, depending on the complexity of the data model for your database, and how thoroughly you define the contents of the three key modules.
The front end of your application is able to connect to the specific resources in the three key back-end modules to retrieve the required data, display it in the appropriate way, and trigger changes in the database (such as to insert a new record).
Our simple application looks like this:

A little more
Let's add some more detail.
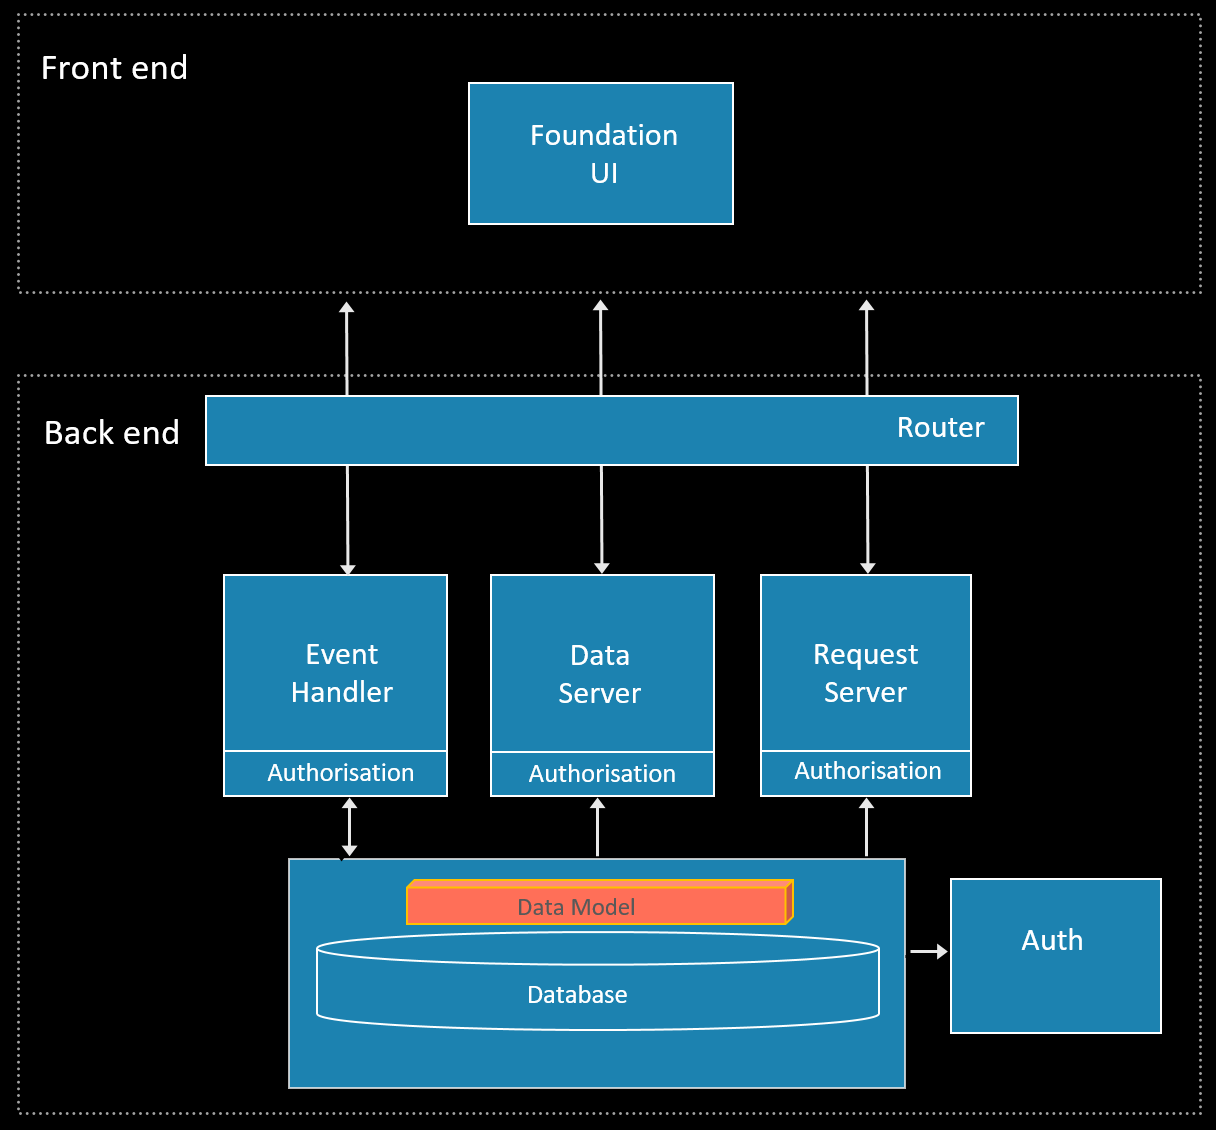
A Router
There is a configurable Router module for both the front and back ends. This ensures that all traffic between the two reaches its destination securely.
Access control
Importantly, you need to make the application secure. This is done by the Auth module. Configure the Auth module to control access to your application (authentication) and permission to see specific items of data or functions (authorisation); to make authorisation precise, it is coded into each key module (if authorisation = x execute ABC).
With those things in place, our diagram now looks like this:

A lot more
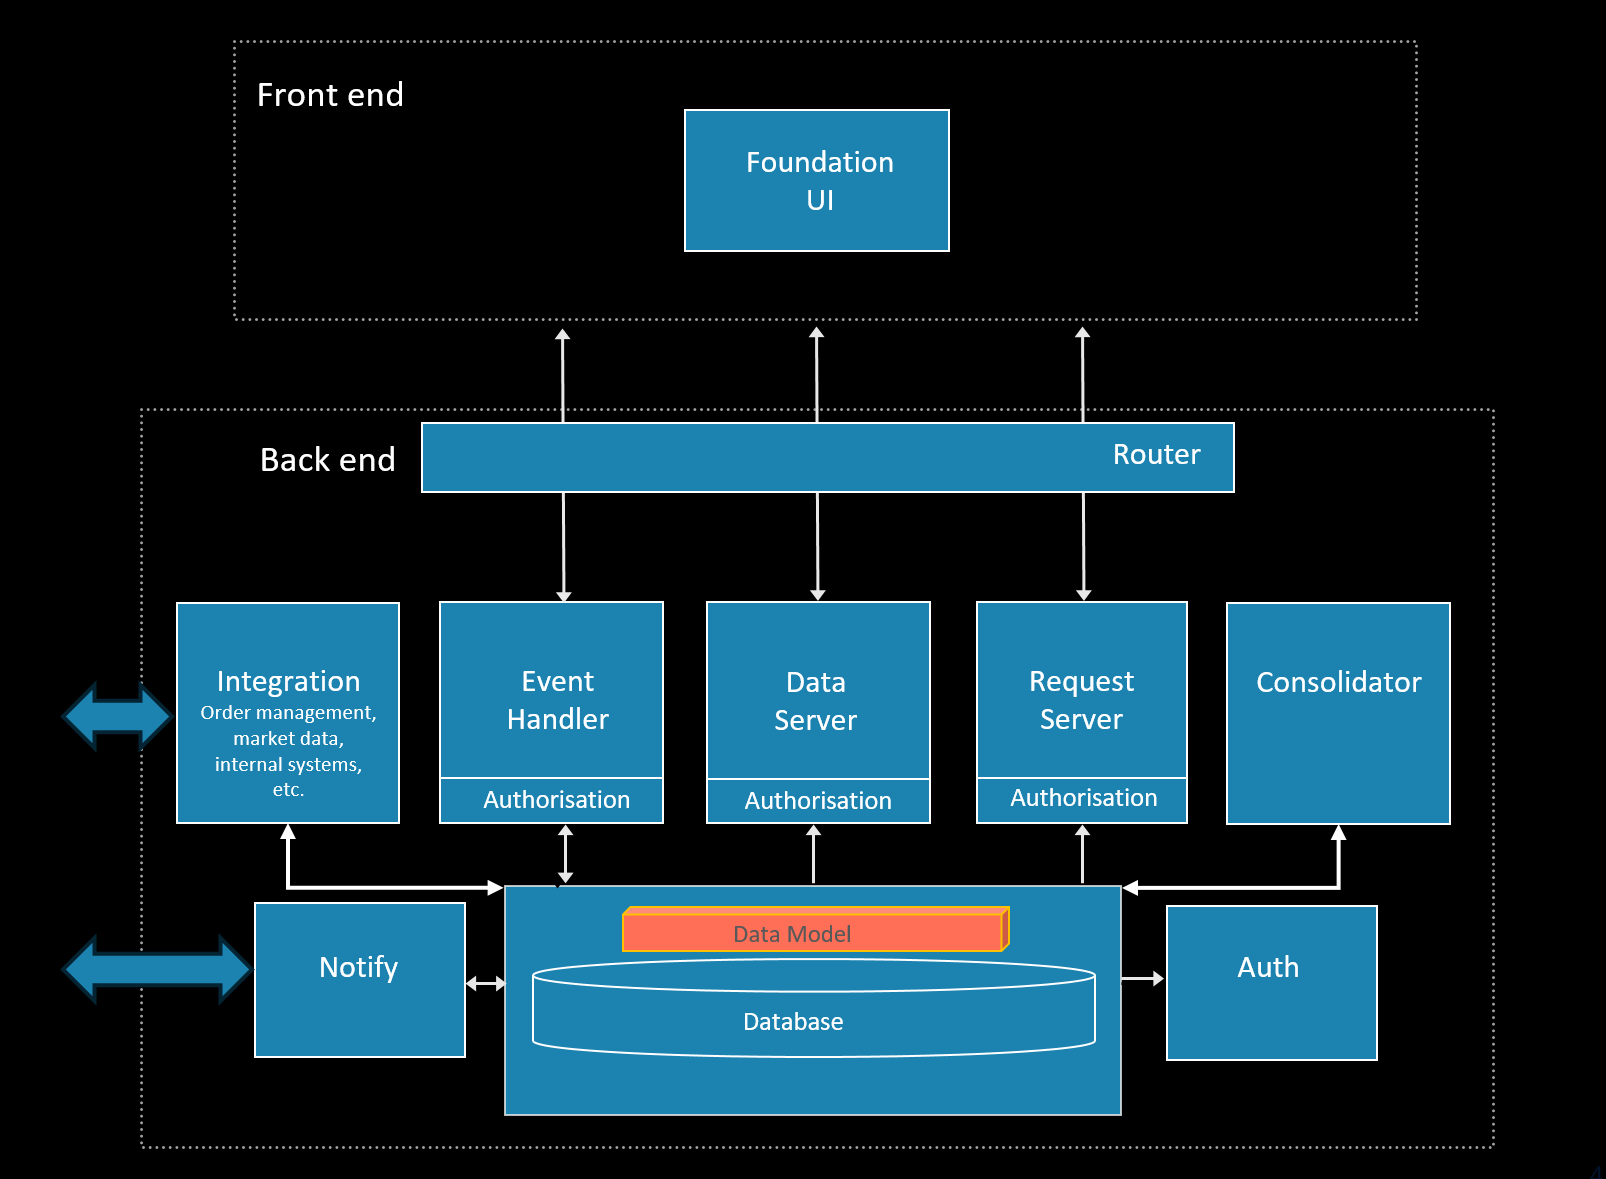
In most cases, you will consider adding further modules to address the scope of your application. For example, you can:
- use the Consolidator to aggregate data or perform other calculations
- integrate with market data or other systems to handle orders, trades, risk and other financial requirements
- use Notify to integrate with email or professional chatrooms
These are typical examples, but there are more. If there is a special niche that is not covered, you can create your own module from scratch.
We have added these three examples, and our simple diagram is beginning to look a bit more complex now:

What you have learnt so far
So far, this is what we have learnt about the back end:
- A database is at the heart, surrounded by three key modules that serve the front end: Data Server (real-time data), Request Server (static data) and Event Handler (database changes).
- The Router module ensures messages are routed correctly to and from the front end.
- The Auth module controls access to the system (authentication) and to specific data and functions (authorisation). Note that the authorisation is defined in the key modules.
- You can add other modules to cover (for example) aggregated (calculated) data and integrations with internal and external systems.
- You can also create your own modules to cover specific requirements.
The front end
To build a rich front end, Genesis provides Foundation UI. This gives you a large set of Genesis web components that you can add to your pages and configure. These include:
-
grids and charts that you can connect to the relevant resources in your Data Server or Request Server
-
interactive elements, such as forms, buttons and checkboxes
-
presentation components, such as banners, dividers, breadcrumbs and progress indicators
Once your components have been configured and connected to the back-end resources, you can use Design System tokens to control colours, typography and sizing of the display.
Micro front-ends
For quick development of common requirements, there are several micro front-ends that you can insert and configure. These are effectively micro applications for the front end, offering a pre-built set of components.
The Entity Management front end, for example, gives you a ready-made grid and an accompanying form for submitting new records. The form is generated automatically from the fields in the back-end resource that you are connected to.
Getting you started quickly
The Genesis platform provides some useful tools that enable you to get moving quickly and start using all those components productively:
Genx
The Genx CLI tool enables you to scaffold new Genesis applications from scratch from a choice of seeds. It creates the correct project structure, provides empty files for the key server modules, and also gives you blank home page files where you can quickly add Genesis components and micro front-ends to create the UI.
Genesis Create
Genesis Create enables you to create a new project and to generate specific code for your key modules and your front end without entering any code.
It provides a series of steps that enable you build the code for a basic application, and then build and run it locally. At each point, you create your requirements by selecting from the available options on screen:
- the tables and views that make up your data model
- the queries that serve data from the database to the front end
- the business components that add additional logic and functionality (such as consolidator and reporting)
- the components that provide data and interaction to the front end, such as grids, charts, forms and buttons
Once you have put those in place, you can click in Genesis Create to generate the code that meets all those requirements. And then you can run the built code and see the result as well.
It means that you (or a Business Analyst, for example) can generate much of the code you need for your application before you flex your developer muscles and start doing the clever-clever stuff.
The Genesis plugin for Intellij
Intellij IDEA is the essential development environment for Genesis applications. This provides an efficient environment for coding, including intellisense that prompts you with correct names of fields, tables and other resources, speeding up coding and cutting down bugs caused by typos.
The Genesis plugin for Intellij extends this environment and enables you to build and test your application locally directly from Intellij as you develop; you can trigger builds, start server processes and monitor their health at any time.
Conclusion
So, that was a very simple introduction. You have seen:
- the key modules that surround the database in the back end
- the front-end components that you can insert and configure; grids, charts and forms can be connected to the back end for data
- tools that speed up and smooth out the development effort: the genx CLI tool, the Genesis plugin for Intellij, and, perhaps most importantly, Genesis Create.
We hope you have found this a useful starting point for your development journey.