Quick start - Create new application
To get started, you need to access the Genesis Create. This is a low-code tool provided by Genesis, which enables you to run a full-stack application with a few clicks.
Contact your account manager to get access to your account; you need a username and a password.
Project attributes
Once you log in, you will see the following screen:
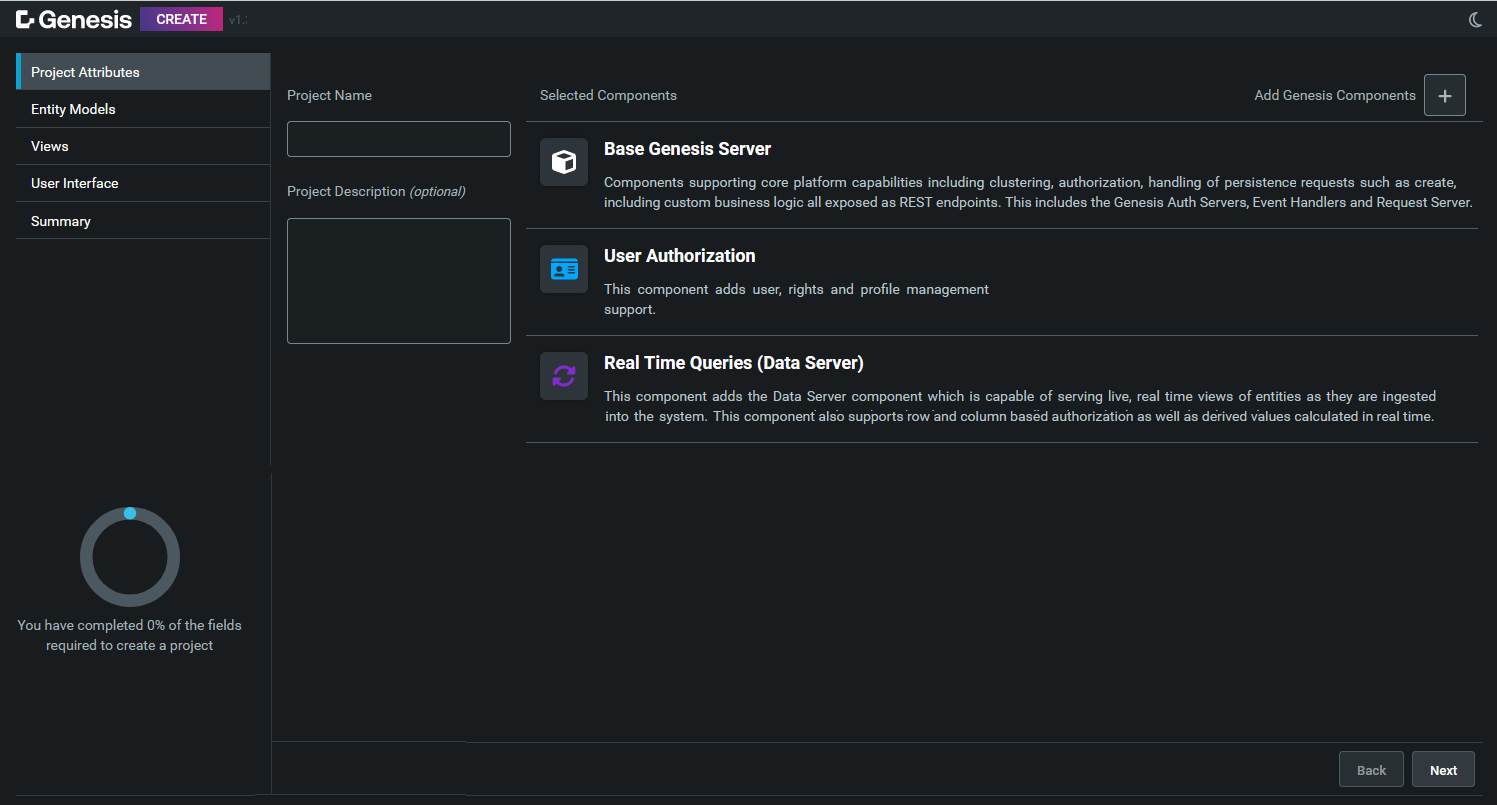
Enter a name for the project and a description. Then click on Add Genesis Components. This displays a list where you can select the components that you want to add to your project. For this quick start, we are adding two components:
- Real Time Queries (Data Server). This component adds the Data Server component which serves live, real-time views of entities as they are ingested into the system. This component also supports row- and column-based authorization as well as derived values calculated in real time.
- Reporting. This component enables users to create reusable report templates and generate reports from any application endpoint.
Use the Search bar to find the Reporting component.
When you have selected all the components that you need, click on Next in the bottom right corner.
Entity models
In this section, you have to create the data model for your application.
An entity is a business object, such as a trade or an instrument. Each entity has a number of attributes, so a trade might have attributes such as a trade ID, an instrument, a price and a quantity.
Genesis turns each entity into a table with the attributes as column headings (fields).
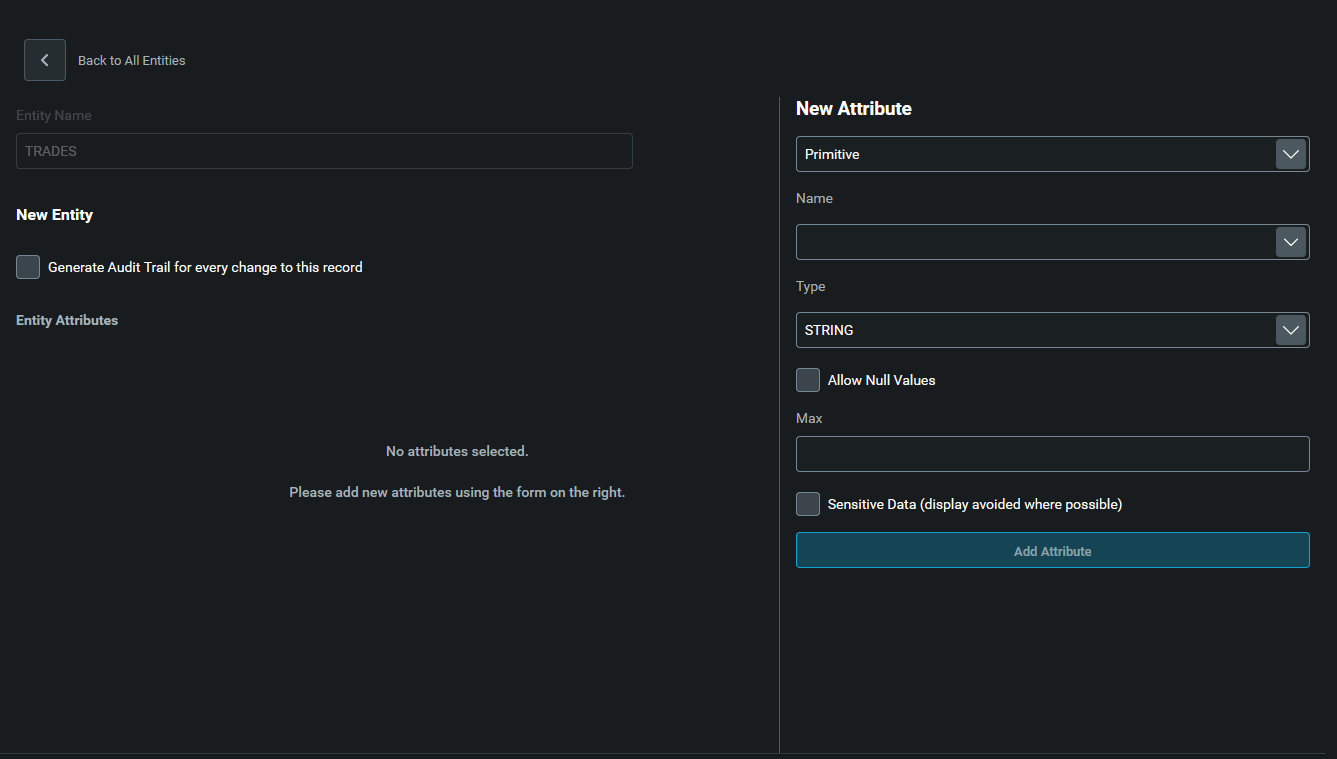
To add an entity, click on New Entity at the top right.
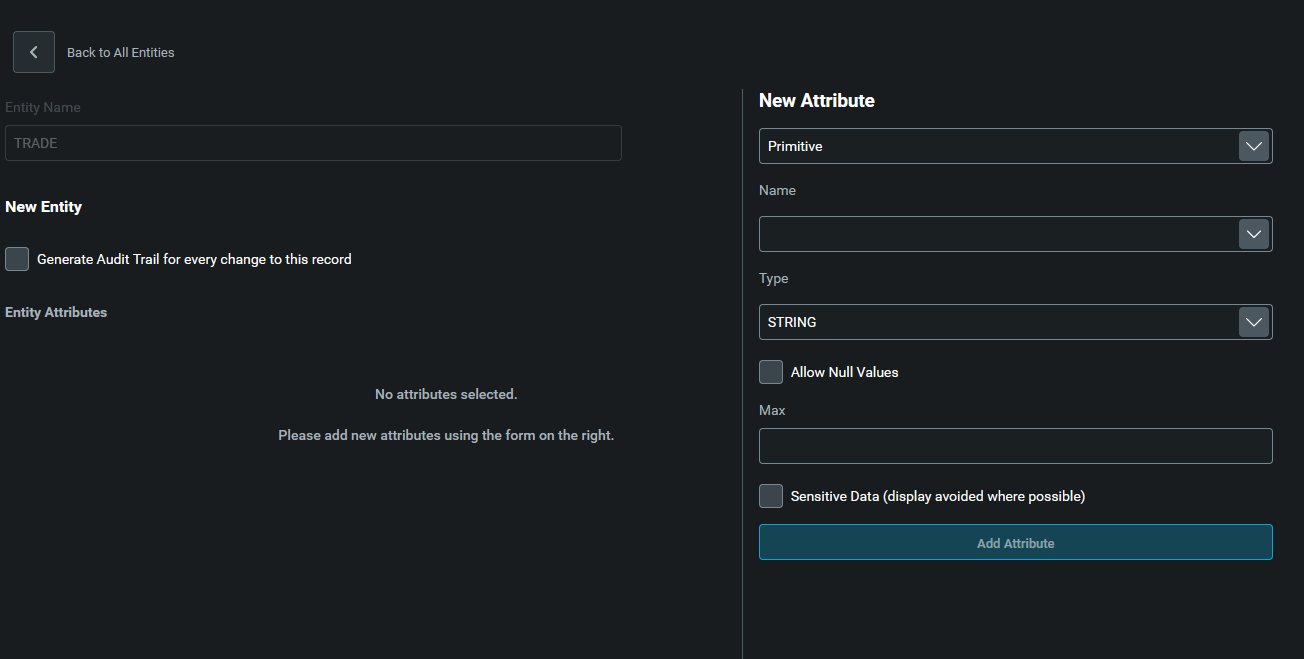
Give your table a name, in our case: TRADES. Then start creating the attributes (fields) for that table.
For each field, there are two types that you can select:
- Primitive. For this type, you create a new field based on primitive types such as
STRING,INT,BOOLEAN, etc. - Entity Reference. For this type, you are creating a new field that already exists in another table. This saves some time when you reuse your fields.
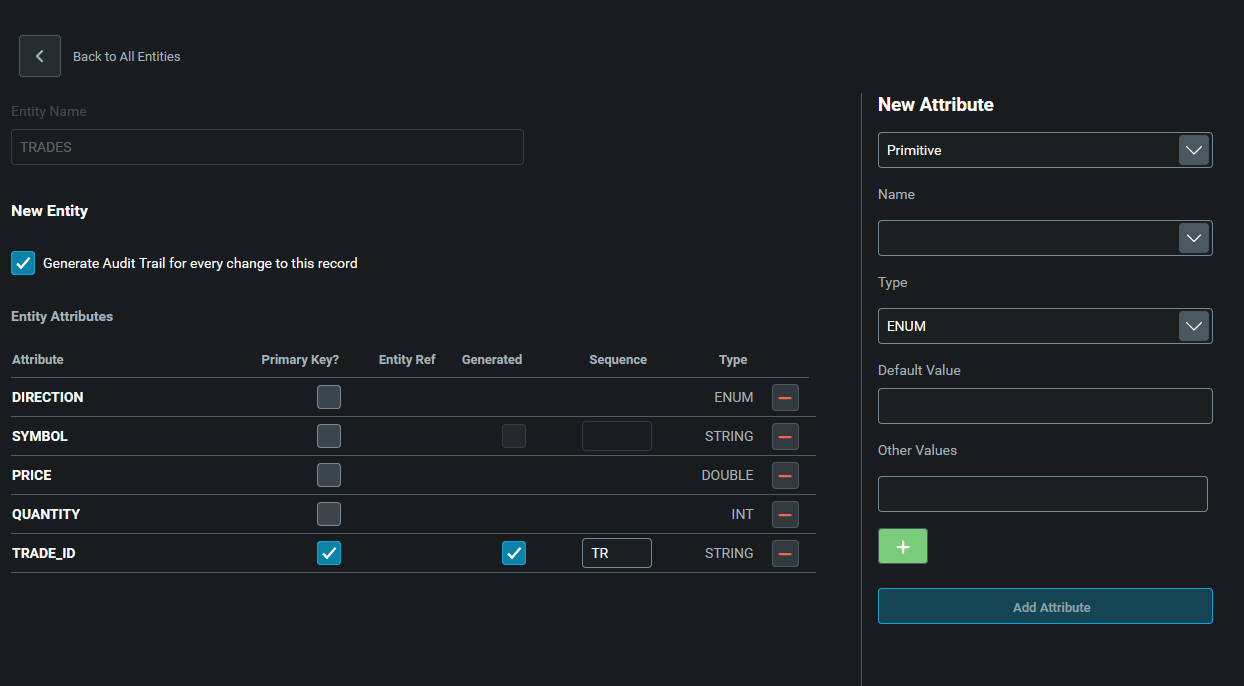
For this quick start, we are creating the table TRADES with the following fields:
| Name | Type | Primary Key | Auto generated | Sequence | Possible values |
|---|---|---|---|---|---|
| TRADE_ID | STRING | Yes | Yes | TR | |
| QUANTITY | INT | No | No | ||
| PRICE | DOUBLE | No | No | ||
| SYMBOL | STRING | No | No | ||
| DIRECTION | ENUM | No | No | BUY, SELL, default: BUY |
Your screen should be like this:
After you finish, Genesis Create automatically creates events for inserting, deleting and modifying. These events are written to the file alpha-eventhandler.kts. To learn more about this file, see the Event Handler documentation.
When you have added all the attributes that you need, click on Back to All Entities to return to the list of entities. The ones you have added so far are listed in the main area. Icons to the right of each entity in the list enable you to edit or delete that entity.
Then click on Next in the bottom right corner.
Views
A view joins two tables (entities) together on a specified field (attribute) to create a more rounded set of data. For example, the Counterparty ID attribute in the Trade entity could be joined to the Counterparty ID attribute in the Counterparty entity.
We are not going to create any views in this exercise (we only have one entity, so we have nothing to join to), but let's look at what we can do here.
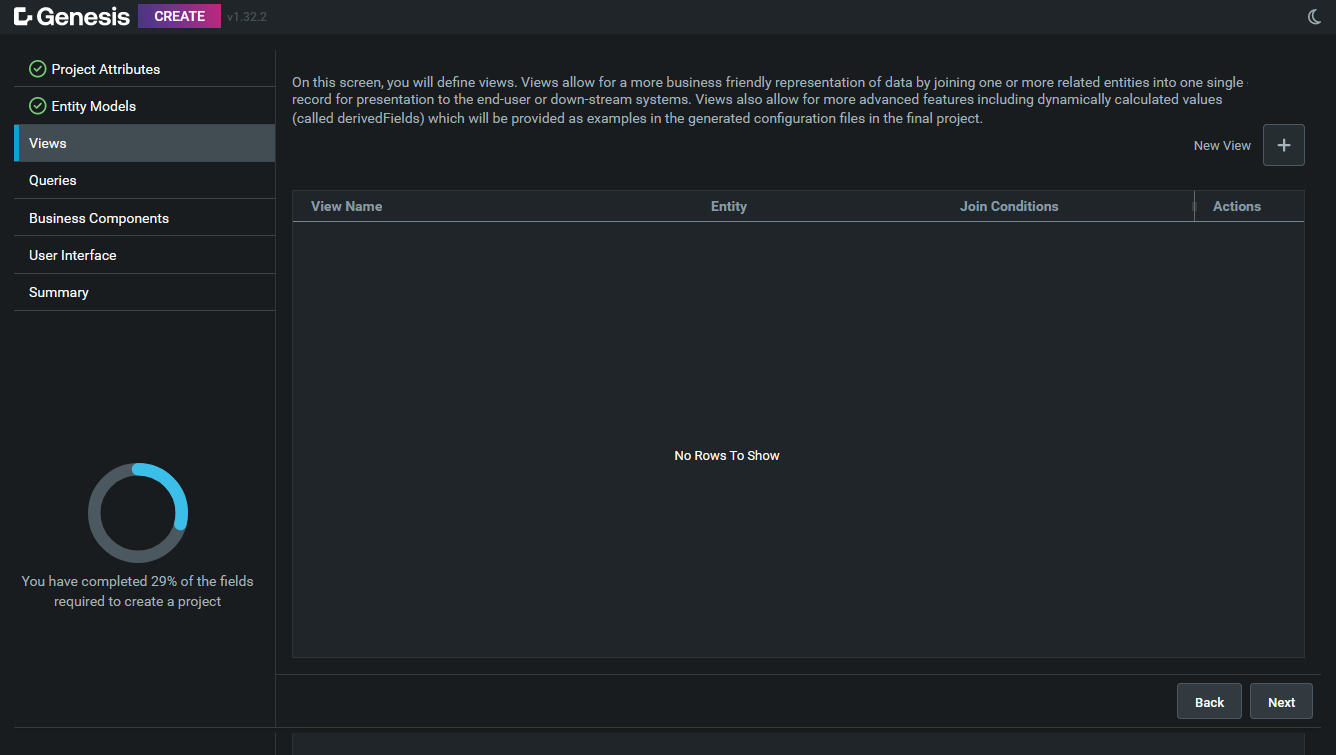
Click on New View to create a new view.

You can select the root table and give your view a name. When you save it, two new sections are unblocked:
- Join Condition enables you to create joins. Of course, before you can create a join, you need to have at least two entities. You have to have something to join to!
- View Configuration enables you to select which fields will be included in that view.
we don't want to go any further, so click on Back to Views. where you will see the empty view that you have just created.
Then click on Next in the bottom right corner.
Queries
Next, we can configure our queries.
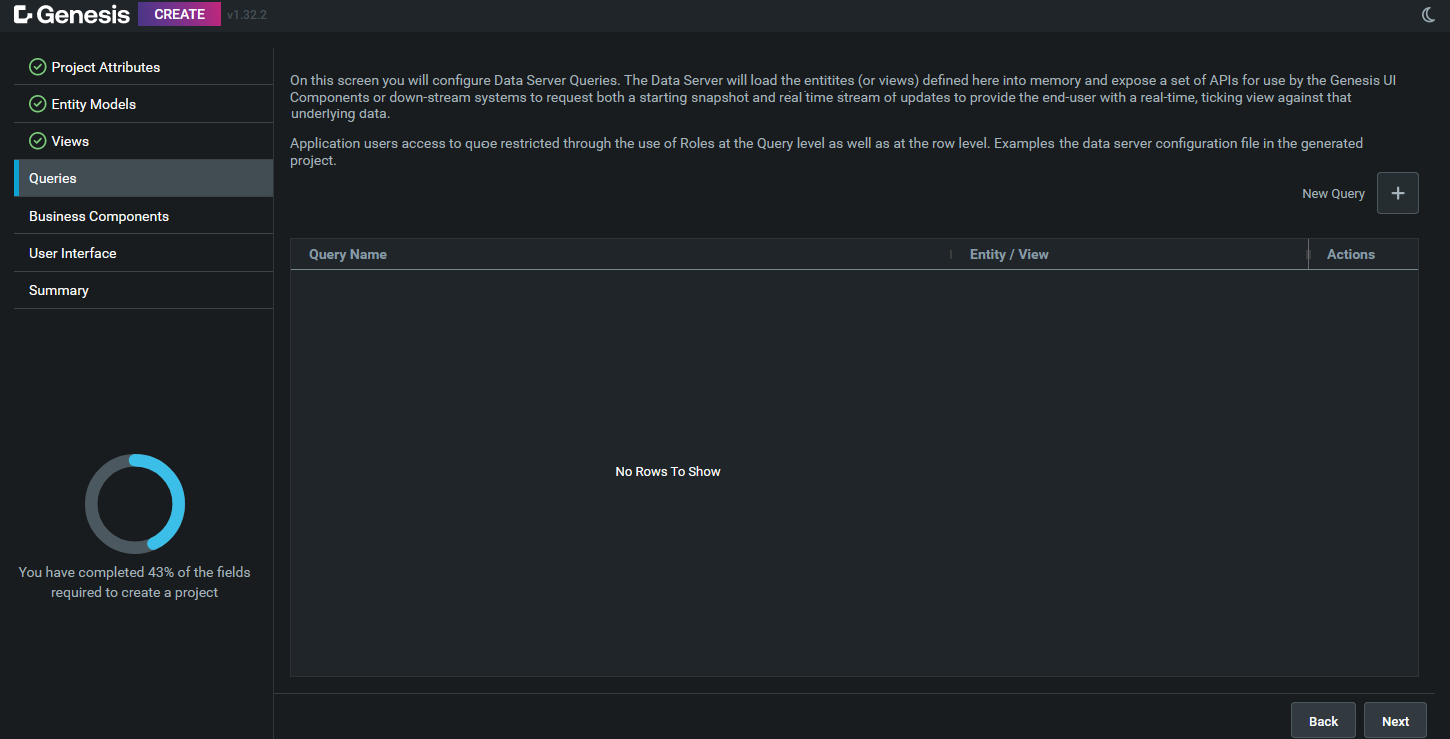
Click on New Query. After that, it will open this page:
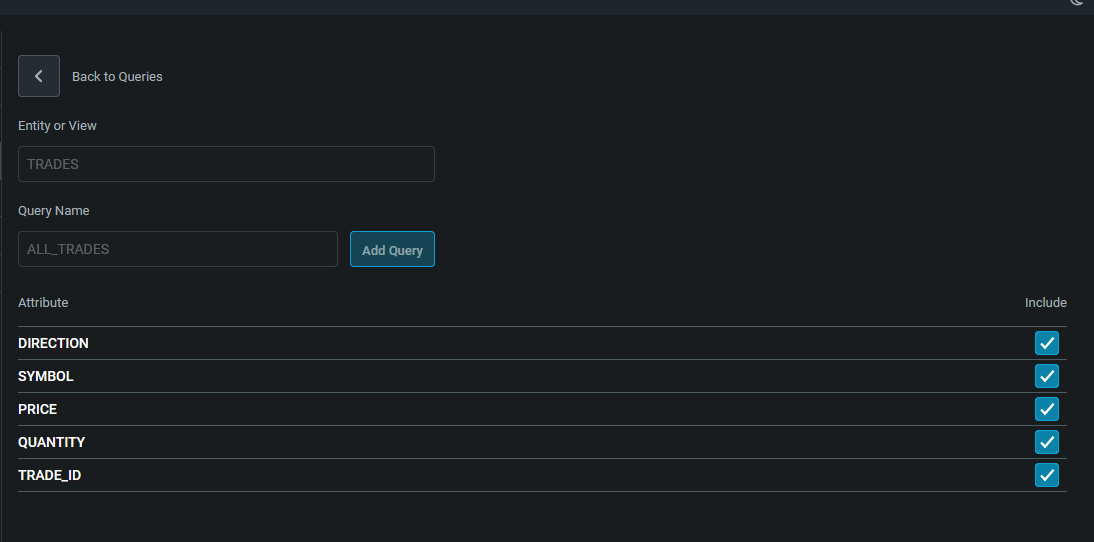
In this section, give the query a name, and select the source of the query. After you save it, the attribute section is unblocked, and you can choose the fields that will be streamed.
In this quick start, we are choosing all fields to be streamed.
When you have completed the query, click on Back to Queries to return to the list of queries.
Then click on Next in the bottom right corner.
Business Components
This section lists all the Business Components that you have selected.
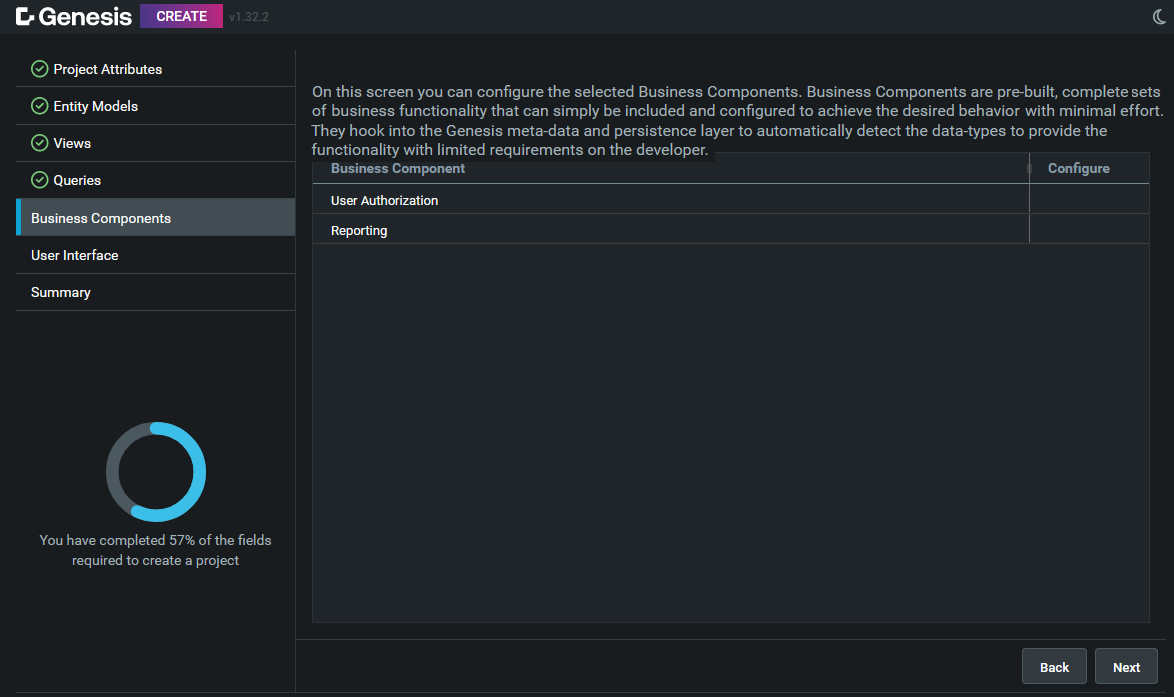
If any component needs additional configuration, an alert icon is displayed, so you can configure it.
To configure a component, click on the Edit icon beside this.
When you have completed configuring all the components, click on Next in the bottom right corner.
User Interface
In this section, you can create pages and add web components to your application.
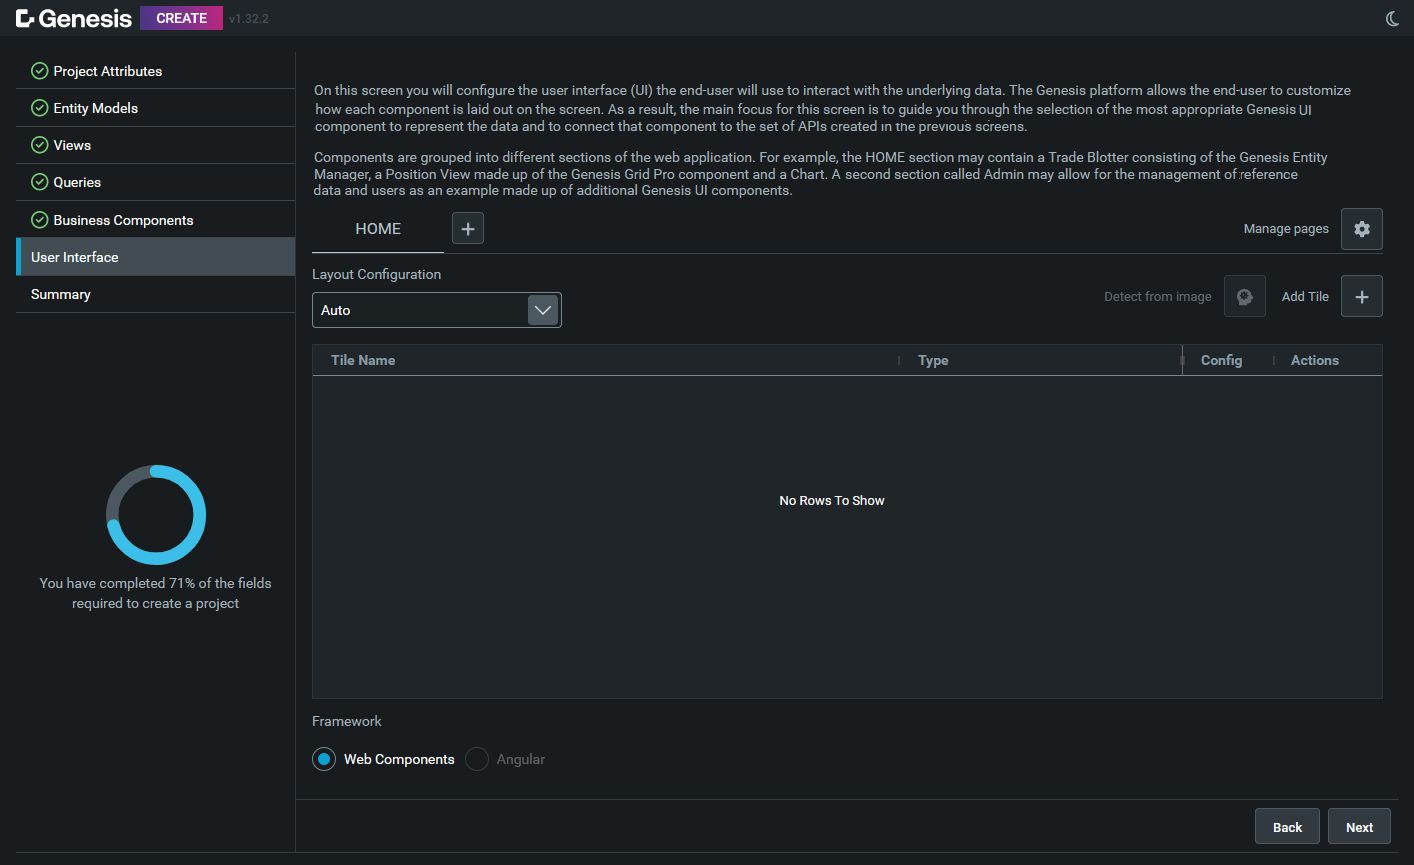
Here you can:
- Add new routes/pages. The default route that is created is called HOME. You can either use this or create new ones.
- Add new components. You can add and configure web components to insert into your application. Today we can insert:
- Entity Management: a component that provides a real-time grid and a form for perform modifications to database values.
- Real time grids: a component that provides the end-user with a real-time data grid connected to the Genesis query configured in a read-only mode appropriate for display only.
- Dynamic forms. This component provides the end-user with a static form created dynamically against an underlying entity that can be fine-tuned on the configuration screen.
- Charts: Create a chart to display your data.
Adding a new web component
For this tutorial, we are going to create a new entity management component for our home page. Click on Add Tile and select Real-Time Data Grid + Data Modifications.
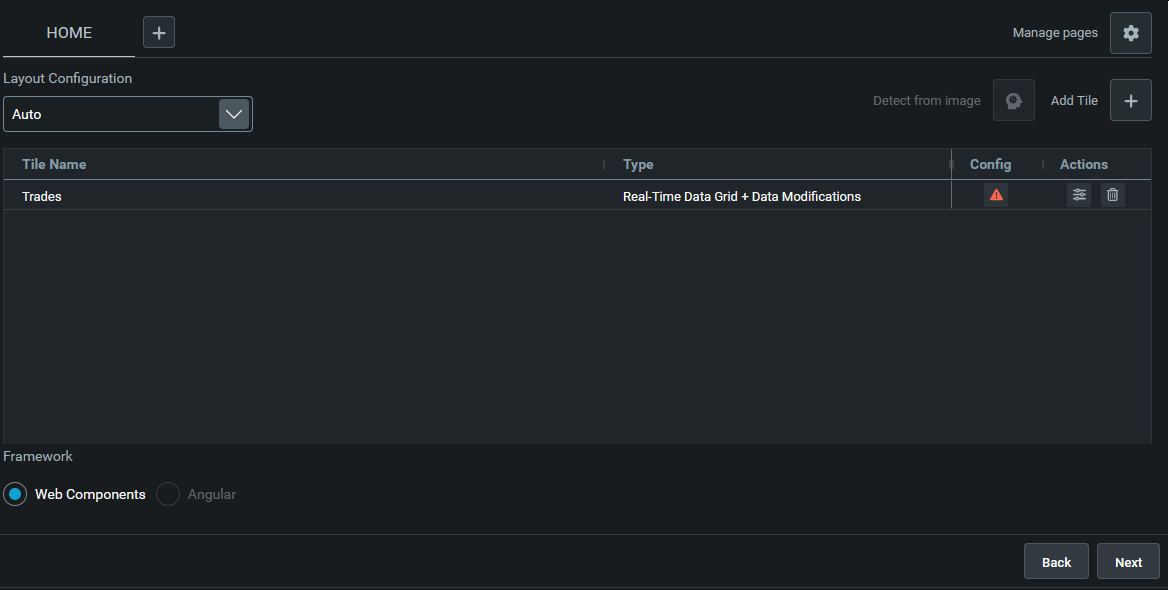
Once you submit, a new row is displayed with an alert on the config column . This indicates that you need to configure your component. Click on the edit button in the actions column.
This displays the following page:
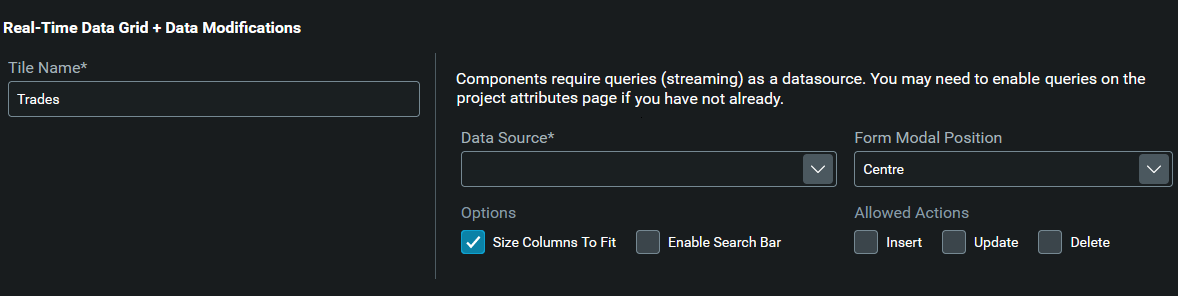
At this point you need to configure:
- The data source of the entity management. This is where your grid will get the data from. Select the source ALL_TRADES. Remember that this source is a query that you have created.
- The position of the modal. The entity management component is composed of a grid and a form. Choose where you want the form to appear. We are choosing right.
- Allowed actions. You can allow the user to insert, delete and modify the data that is being displayed. Choose which actions you want the user to be allowed. We are choosing all actions: delete, insert and modify.
After you choose the data source, the Configure Grid and Forms section will be unblocked:
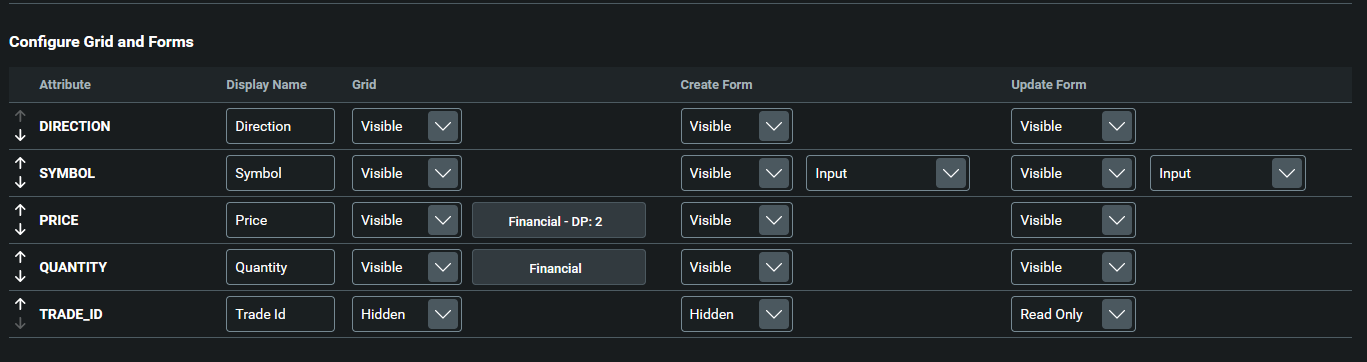
Here, you can configure the order of the fields in the grid and in the forms. You can also change how the field name is displayed, and you can change the visibility of each field.
For this tutorial, we are not changing any configuration at this point.
Summary
When have completed the UI configuration, you can proceed to the last step, which is the summary:
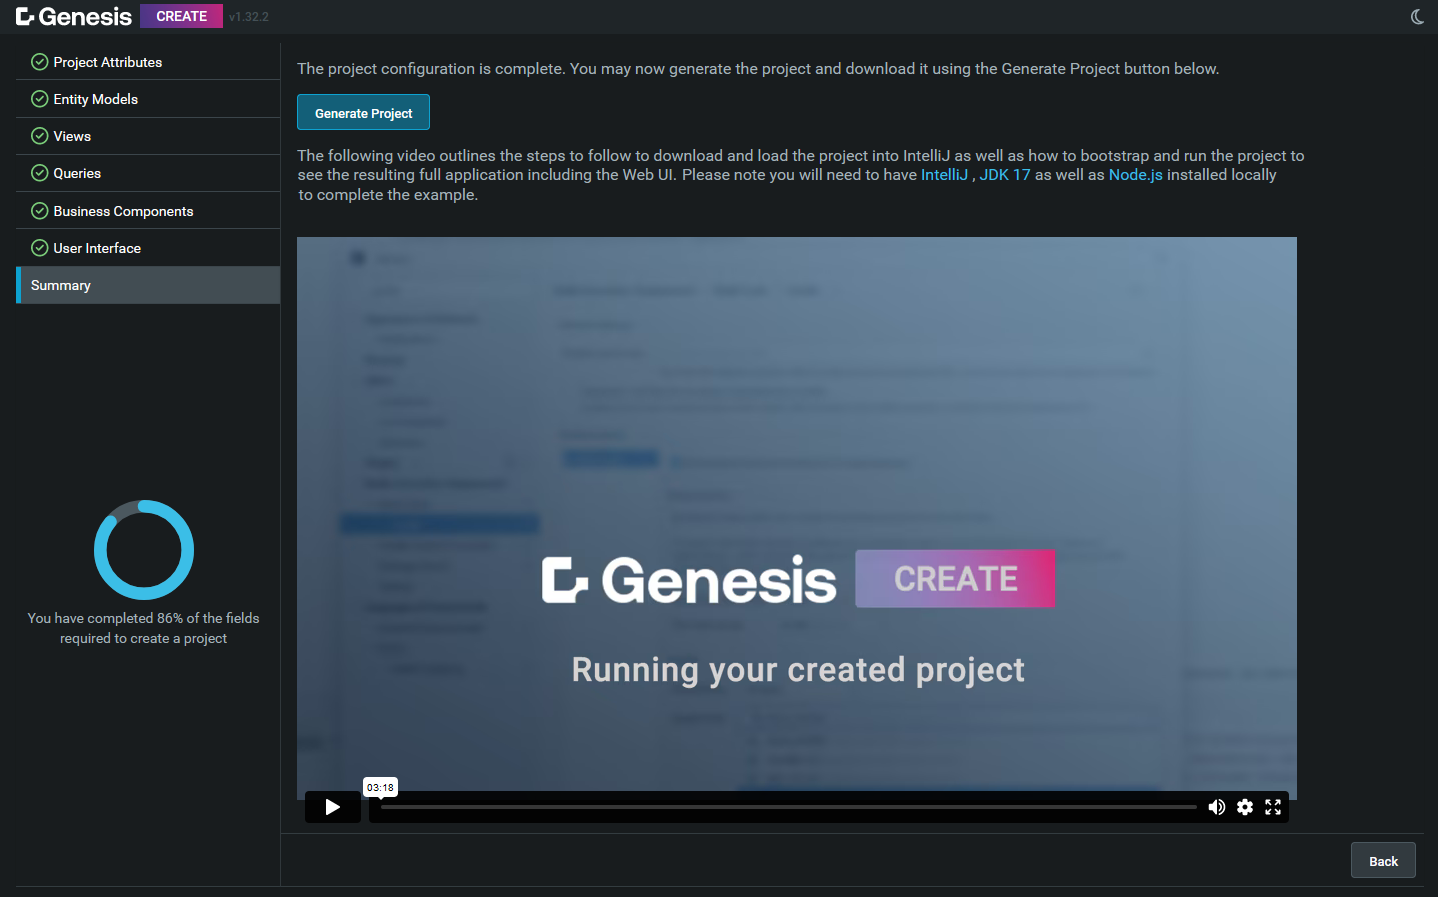
Here there is a video explaining the next steps. There is also a button so you can generate your project. Click on this, to download your project in a .zip file. Then you can unzip it locally and open it in intelliJ.
When you first open your project in IntelliJ, a pop-up appears requesting you to load the gradle project. Make sure you click on "Load Gradle Project".