Prerequisites - genx
Seed and Genx
A seed is a user-friendly, buildable template by Genesis for generating an application/platform project. It can be an approved baseline for multiple applications with, of course, different owners and parameters and not just one.
It is important to note that a seed acts like a standard baseline; even though it can be modified by seed owners, it should not be. However, developers and testers are free to experiment on the applications that they build on a seed.
Correlation between a seed and Genx
Genx is a Genesis command-line utility that enables you to access a parameterised seed and generate a new project from it.
This blank-app-seed is called the Quick Start Application; it is used to create a basic Genesis project.
When you create an application with Genx, you will see seed listings in different versions. There are only two seed versions approved by Genesis:
- Seed A
- Seed A (Next/Pre-Release)
When presented, these choices enable you to build on the official Seed A baseline, which is stable and provides early access to what is being prepared. The Seed A (Next/Pre-Release) version of the official seed A is for experiment or testing only.
You should ignore any other seed version listings.
Main differences between the two seed versions
| Seed A | Seed A (Next/Pre-Release) |
|---|---|
| Official seed for the actual application development | For test/experimentation purpose |
| Ongoing support, upstream fixes and upgrades available | No support available |
Some important points to note about seeds used by Genx:
- Any local directory/project can become a seed by adding a root level .genx directory (CLI API)
- Developers may clone an existing seed to form a new one
- Developers contribute to official seeds by cloning that seed repo
- Select code owners manage merges
- Available to all Genesis users
Prerequisites
- Recommended Operating system : Windows 10 Pro
- Node.js version 20
Launching genx
Open a terminal on your machine and launch the CLI tool using this:
npx -y @genesislcap/genx@latest init myApp
This command presents you with a sequence of choices for creating and configuring applications.
Using genx
First, you'll be prompted the following messages:
 ℹ Downloading genesiscommunitysuccess seed blank-app-seed (Git ref main) to myApp directory...
✔ Seed downloaded in 1554ms
ℹ Installing seed NPM dependencies...
✔ Installed

  Thanks for choosing this seed:
  Name: @genesiscommunitysuccess/blank-app-seed
  Description: Genesis Blank App Seed
  Version: 1.0.0
  License: Apache-2.0

  You can override the default Genesis server URL used during local development.
Next, you will be asked to set an API host. The default is Yes.
? Set API Host (Yes/no)
If you choose Yes, then you need to provide an API Host. Default is (ws://localhost/gwf/):
? API Host (with WebSocket prefix and suffix if any)
After that it will ask if there is any SSO connection. Default is (No):
? Init SSO connection before loading application
The next prompts concern the back-end part of the application.
The first prompt is for the group id:
? Group Id global.genesis
... and this is followed by the application version:
? Application Version 1.0.0-SNAPSHOT
Press Enter and you should be greeted by a message saying that the application was created successfully.
Open the project in IntelliJ to start building. But note - it takes a few minutes to set up the folder structure, so be patient.
Here's a quick overview of the generated application's folder structure:
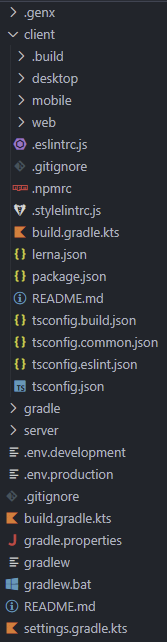
Above, we have expanded the client folder. This contains all the UI-related projects.
The server folder follows the same structure. This contains all the server-side projects.
Workspaces
Workspaces are top-level client monorepos that contain various packages, such as components, micro front-ends, design systems, and at least one application. All these packages can be versioned and released independently. This set-up provides an enhanced developer experience.
The workspace generator automates the following steps for you:
- It creates a local workspace from a local or remote seed and configures it.
- It persists the information captured during your CLI session within the workspace filesystem for future use.
Workspaces and application filesystem
Your apps are local to workspaces; they don't exist in isolation.
After you have created a workspace, your workspace filesystem should look something like this (depending on the seed).
./packages/
├── apps
│   ├── demo
├── components
├── design-systems
│   └── alpha
├── micro-frontends
├── services
└── utils
This is a monorepo containing multiple packages. Each package can be released independently.
Genx commands
For more information about the Genx commands, please check out our Genx CLI commands page.