Server tooling - Genesis IntelliJ Plugin
The Genesis Intellij Plugin enables you to run the full stack of a Genesis application locally within IntelliJ, so you can check and test your development work as you progress.
Installation
- The plugin is available from the Jet Brains Marketplace. You can install it by searching for Genesis Platform Support from the plugin section of your IntelliJ settings.

- After installing the plugin, make sure you add it so that it is visible on the Tool window bars and buttons.
That's the end of the installation process. If you have come here from the Quick Start guide, you can go back now.
How to use the Genesis IntelliJ Plugin
To run a development application locally using the plugin, you must have:
Project requirements
- a Genesis project where your front-end and back end are being developed
- a Gradle project
- a mono repo (the client and server must be in the same repository)
Local requirements
- a Database Technology supported by Genesis available and running
You could use, for example, PostgreSQL running a local instance or a Docker container.
docker ps --format '{{ .ID }}\t{{.Image}}\t{{ .Names }}'
docker pull postgres
docker run --name localPostgresDb -p 5432:5432 -e POSTGRES_USER=postgres -e POSTGRES_PASSWORD=postgres -d postgres postgres -c 'max_connections=100'
The Tools window
Setting the overrides
To run locally, you need to override the values set in your system definition configuration (which contain a url for the host).
With the Genesis IntelliJ Plugin, system definitions can be overriden via the plugin settings. When editing plugin settings you do not need to redeploy, unlike editing *-system-definitions.kts files.

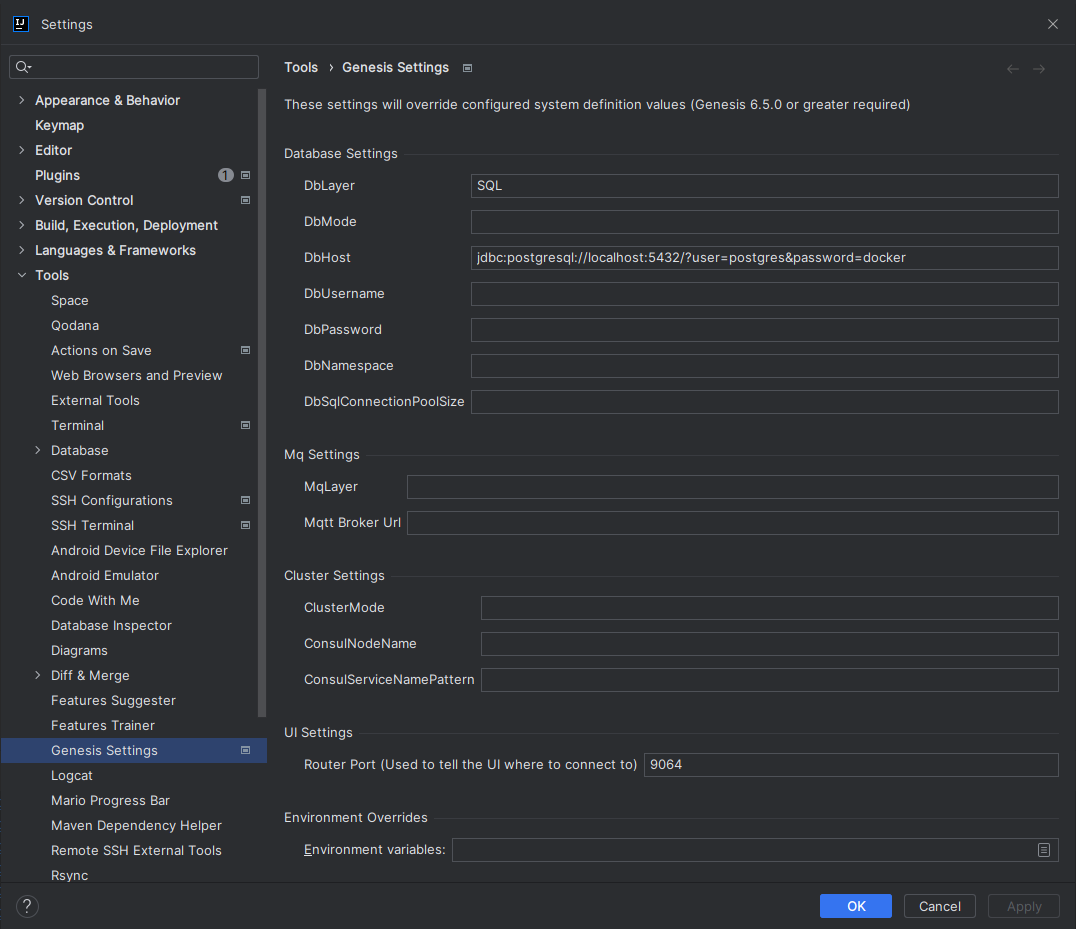
A local PostgreSQL installation with user and password both equal to postgres would have a DbHost like this:
jdbc:postgresql://localhost:5432/postgres?user=postgres&password=postgres
Setting up genesis.home
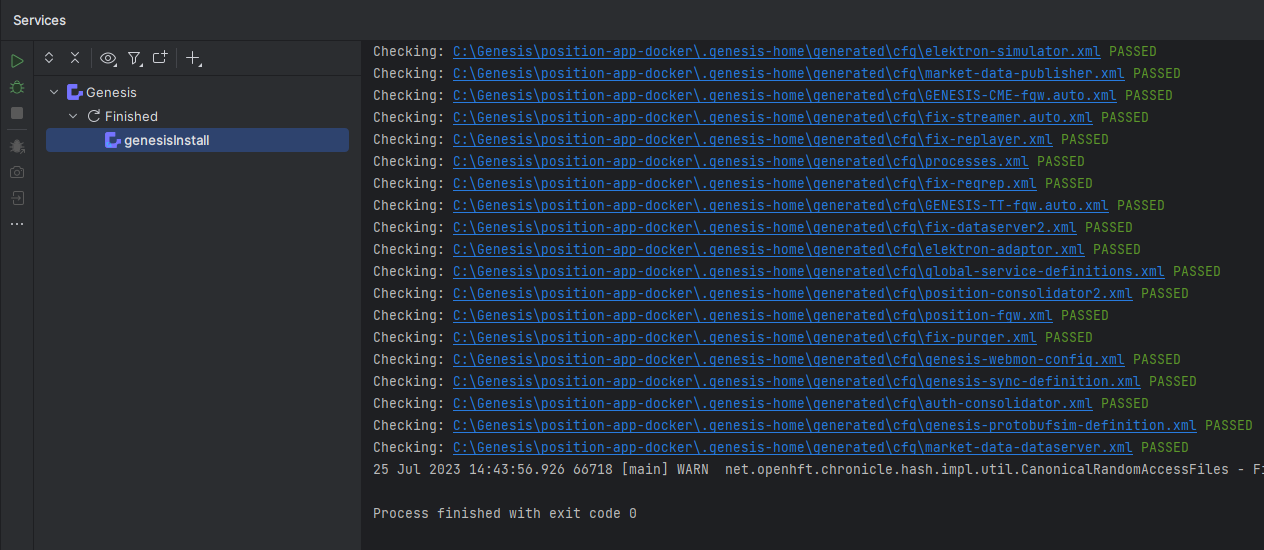
When first using the plugin with a project, you must create your genesis home folder; click on the Install Genesis button on the Tool window.

This generates a folder called .genesis-home in your local project's root directory, ready to run your application's processes.
This may take up to 20 minutes on the first run, because it performs a full build of your application.
Remap
Before starting the Resource Daemon, run a remap to write the schema to the database. You can do this from the Genesis icon at the top of the Tool window.
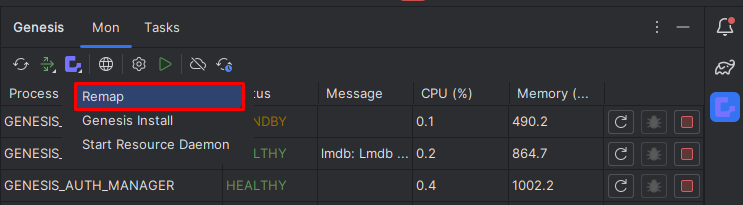
This opens a new Run window in IntelliJ and requires you to confirm the changes by typing y and pressing Return.
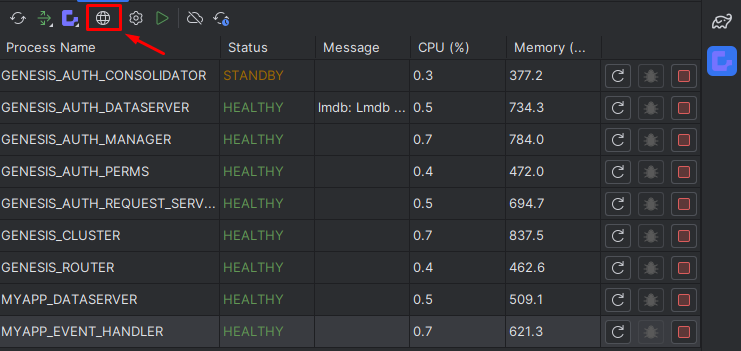
Resource Daemon
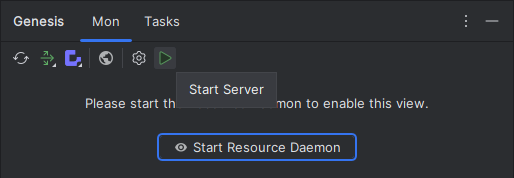
The Resource Daemon provides health information about your processes; it enables you to start and stop your processes via the Process view.
To start the Resource daemon, press the Start Resource Daemon button.
Alternatively, if using the startServer button to start all of your processes at once, the Resource Daemon will be started for you.
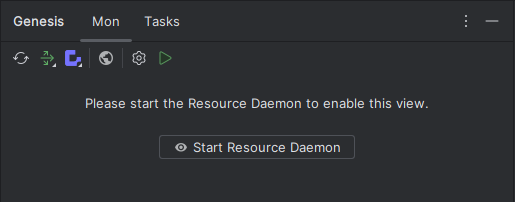
Once the resource daemon has started, you should see a list of your processes along with the status of each one.
Starting processes
To start a process, click the Start button displayed for that process.
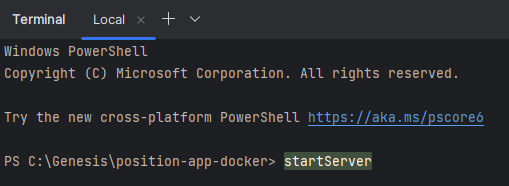
You can also start all your processes at once using the startServer button in the tool window.
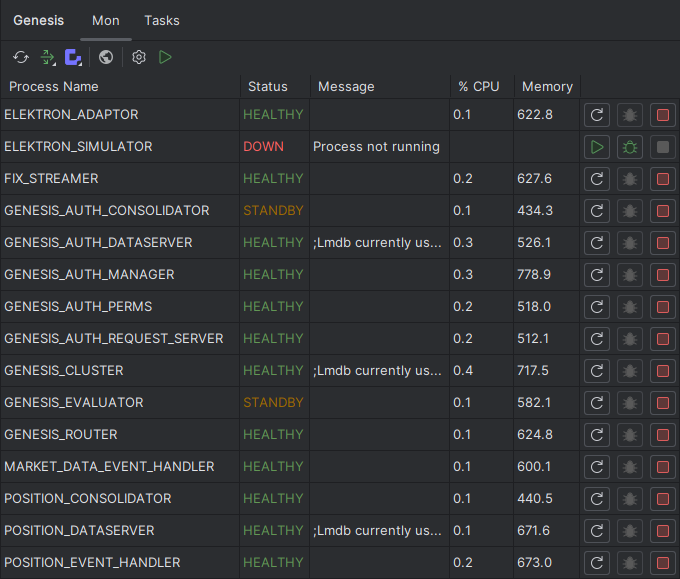
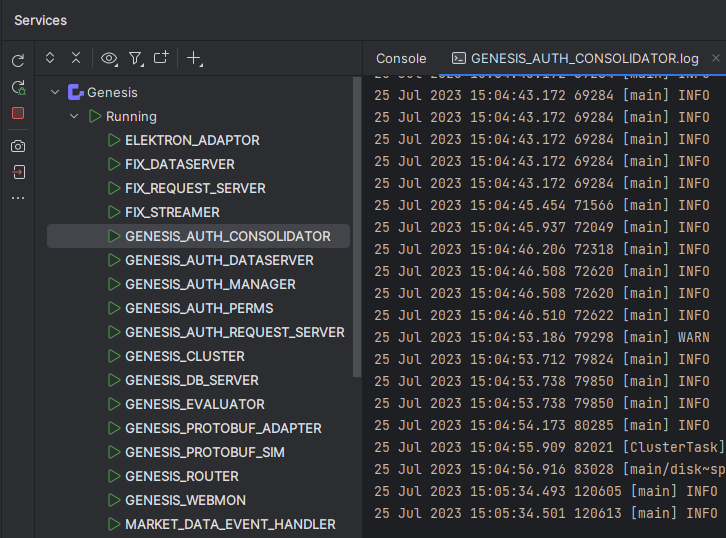
Starting all processes at once in large projects can take some time. By default, it opens a run window for each process. To clean up the UI, use the Services window for better organisation (only available in IntelliJ Ultimate Edition).
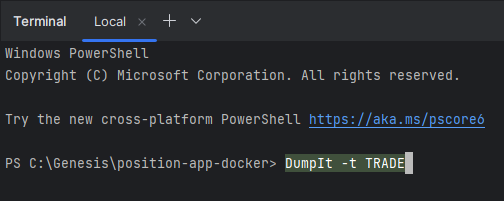
Using the terminal
Every process and script that you can run via the UI can also be run via the IntelliJ terminal window. Recognised commands are highlighted in green and can be run by pressing Ctrl + Enter.
You can include arguments when you run commands from the terminal, which is easier than editing run configs to add them.
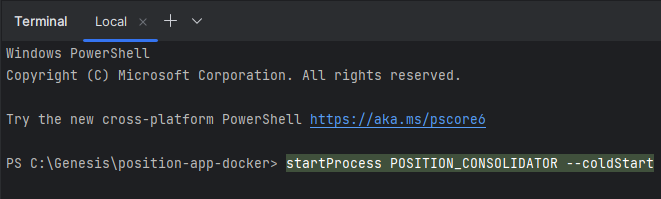
Although these commands are entered in the terminal, when they are executed they open the relevant window in your IDE - just as if you were running via the UI.
For ease of use, some commands that are not strictly processes or scripts have been added:
startServerstarts all your registered processes (as well as the Resource Daemon), as you would when running in a Unix-based environment.killServerstops all running processes (this also includes the Resource Daemon).startProcesscan be used for familiarity, but note that the process name itself is also a valid command e.g.MY-APP-CONSOLIDATOR --coldStart.killProcessstops an individual process.
Note: As with other plugin features, terminal commands will not be available until indexing has been completed.
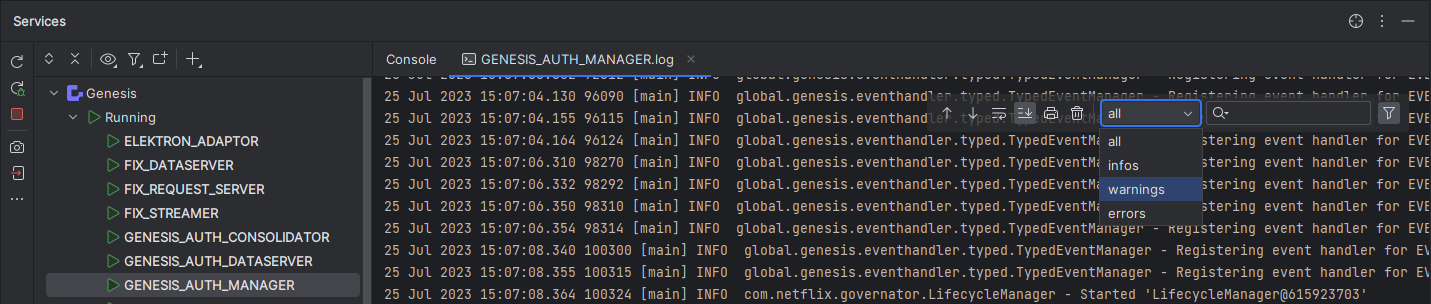
Log files
When starting services, the log file is automatically attached to the run or debug window.
The window has two tabs:
- console output
- the log file for the process
The log file view defaults to show only warnings. You can change the level from the dropdown on the right of this screen.
Log level
Currently, the plugin does not pick up <loggingLevel> entries in processes.xml files.
To set the log level for a process, use the LogLevel script.
Chronicle files
On Windows, set LSOF_AVAILABLE to false in order
for the Chronicle queue files to be properly cleaned up.
Debug
It’s possible to debug ‘normal’ code using the debug option from the generated run configurations.
Starting the UI
To start your Genesis UI, click the Start UI button on the tool bar. This builds your front-end codebase and starts the webpack webserver in development mode. Once started, this launches a browser tab showing your application's login screen.
Note that we are using GENESIS_ROUTER as our API_HOST; its default port is 9064. Therefore, your router port in the settings should be as below.

Making a change
When changing files related to a certain process, there is no need to redeploy the entire application.
When you restart a process, the modules relating to the process will be rebuilt and re-deployed automatically.
For wider-reaching changes, such as changing dependencies, you must redeploy the application:
- Click on the Deploy Genesis button on the toolbar.
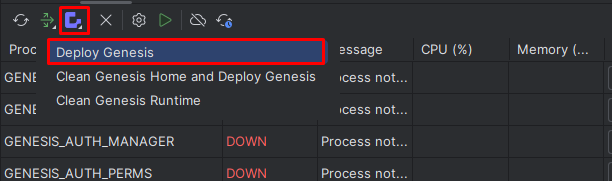
- Redeploying the application requires the Genesis processes to be stopped. When you are prompted for this, click ok to continue.

This starts the build processes and the logs will be shown below.
- Once the redeployment has been completed, you are asked to start the Resource daemon again:
- Once the Resource daemon starts, you can start the processes you wish to have running.
Loading data into the application
Using the plugin, you can right-click on CSV files or folders containing CSV files and select the Import CSV(s) to Genesis option.
This takes the CSV files and uses the Genesis SendIt utility to load the data from those files into tables with matching names.
Tasks view
Apart from the Mon view, there is the Tasks view, where it is possible to see, run and modify the configurations of Genesis services, scripts, and set-up.

Running a Genesis script
The preferred way of running a script is via the IntelliJ terminal window; any script visible in the view can be run via the terminal and arguments can be applied easily.
Once a script has been run, the passed arguments are saved in the run config for the script until new arguments are passed.
To run a script with the same arguments, just re-run the run config.
Alternatively, open the folder Scripts, find the one you want to run, right-click on it and select Run.
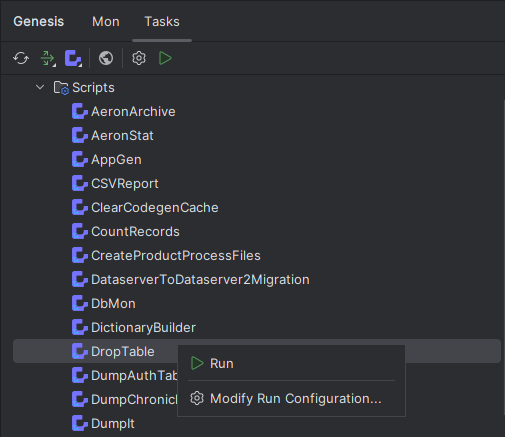
The example above runs the DropTable script. This has parameters, so make sure you configure them using the "Modify Run Configuration..." option, setting the Args property.
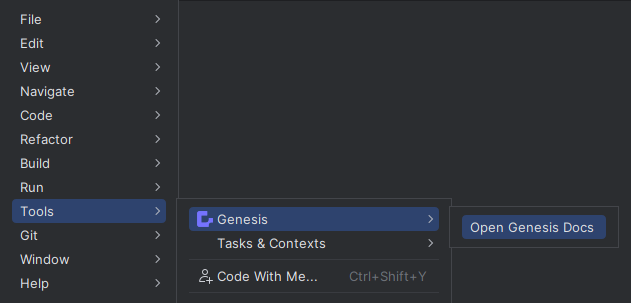
Access to the docs
You obviously have access to the documentation, because you are reading it right now. But it is worth noting that there is a link from the Tools menu in IntelliJ that opens the documentation: