Angular - adding Genesis to Angular
This guide shows you how to add the Genesis framework to an existing angular project. It assumes you want to use authenticate and connect to genesis backend.
If you are starting a new project, we recommend using the Genesis Create tool.
The directory structure that we want to create looks like this. You may already have other directories containing components, pipes, services, modules, directives, etc.
├── README.md
├── angular.json
├── globals.d.ts
├── package-lock.json
├── package.json
├── src
│ ├── app
│ │ ├── app-routing.module.ts
│ │ ├── app.component.html
│ │ ├── app.component.scss
│ │ ├── app.component.spec.ts
│ │ ├── app.component.ts
│ │ ├── app.config.ts
│ │ ├── app.module.ts
│ │ ├── components
│ │ │ └── home
│ │ │ ├── home.component.html
│ │ │ ├── home.component.scss
│ │ │ ├── home.component.spec.ts
│ │ │ └── home.component.ts
│ │ ├── directives
│ │ │ └── app-lazy-load.directive.ts
│ │ ├─�─ guards
│ │ │ └── auth.guard.ts
│ │ ├── layouts
│ │ │ ├── base.layout.ts
│ │ │ ├── blank
│ │ │ │ ├── blank.layout.css
│ │ │ │ ├── blank.layout.html
│ │ │ │ ├── blank.layout.spec.ts
│ │ │ │ └── blank.layout.ts
│ │ │ └── default
│ │ │ ├── default.layout.css
│ │ │ ├── default.layout.html
│ │ │ ├── default.layout.spec.ts
│ │ │ └── default.layout.ts
│ │ ├── pages
│ │ │ └── auth-login
│ │ │ ├── auth-login.component.css
│ │ │ ├── auth-login.component.html
│ │ │ ├── auth-login.component.spec.ts
│ │ │ └── auth-login.component.ts
│ │ ├── services
│ │ │ └── auth.service.ts
│ │ ├── share
│ │ │ ├── foundation-auth.ts
│ │ │ ├── foundation-login.ts
│ │ │ └── genesis-components.ts
│ │ ├── types
│ │ │ ├── layout.ts
│ │ │ └── menu.ts
│ │ └── utils
│ │ └── getLayoutNameByRoute.ts
│ ├── assets
│ ├── environments
│ │ ├── environment.prod.ts
│ │ └── environment.ts
│ ├── favicon.ico
│ ├── index.html
│ ├── main.ts
│ ├── styles
│ │ ├── design-tokens.json
│ │ └── styles.css
│ └── styles.scss
├── tsconfig.app.json
├── tsconfig.json
├── tsconfig.spec.json
├── webpack.dev.config.js
├── webpack.prod.config.js
└── webpack.shared.config.js
Install genesis npm modules
The first step is to install the required Genesis npm modules. In the root directory of your angular project, run the following command.
npm install --save @genesislcap/foundation-comms @genesislcap/foundation-entity-management @genesislcap/foundation-header @genesislcap/foundation-layout @genesislcap/foundation-login @genesislcap/foundation-zero @genesislcap/foundation-zero-grid-pro @genesislcap/g2plot-chart @genesislcap/rapid-grid-pro
Then run the following command to install the development dependencies:
npm install --save-dev svg-url-loader file-loader @angular-builders/custom-webpack
Update the build configuration
To update your build configuration, you need to:
- update your angular.json file
- add some custom webpack config files
- update your tsconfig.json file
First, go to your angular.json file and add the following config. In the code below, replace project-name and prefix to match your application settings.
  ...
    "projects": {
      "[project-name]": {
        "projectType": "application",
        "schematics": {
          "@schematics/angular:component": {
            "style": "scss"
          }
        },
        "root": "",
        "sourceRoot": "src",
        "prefix": "[your-app-prefix]",
        "architect": {
          "build": {
            "builder": "@angular-builders/custom-webpack:browser",
            "options": {
              "customWebpackConfig": {
                "path": "./custom-webpack.config.js",
                "mergeStrategies": {
                  "externals": "replace"
                }
              },
              "outputPath": "dist/angular-comparison",
              "index": "src/index.html",
              "main": "src/main.ts",
              "polyfills": ["zone.js"],
              "tsConfig": "tsconfig.app.json",
              "assets": ["src/favicon.ico", "src/assets"],
              "styles": ["src/styles/styles.css"],
              "scripts": [],
              "allowedCommonJsDependencies": [
                "lodash",
                "dayjs",
                "bowser",
                "fast-safe-stringify",
                "dlv",
                "consola",
                "lodash.debounce",
                "d3-regression",
                "size-sensor",
                "pdfast",
                "fmin",
                "@json-schema-tools/dereferencer"
              ]
            },
            "configurations": {
              "production": {
                "customWebpackConfig": {
                  "path": "./webpack.prod.config.js"
                },
                "fileReplacements": [
                  {
                    "replace": "src/environments/environment.ts",
                    "with": "src/environments/environment.prod.ts"
                  }
                ],
                "budgets": [
                  {
                    "type": "initial",
                    "maximumWarning": "500kb",
                    "maximumError": "1mb"
                  },
                  {
                    "type": "anyComponentStyle",
                    "maximumWarning": "2kb",
                    "maximumError": "4kb"
                  }
                ],
                "outputHashing": "all"
              },
              "development": {
                "customWebpackConfig": {
                  "path": "./webpack.dev.config.js"
                },
                "fileReplacements": [
                  {
                    "replace": "src/environments/environment.ts",
                    "with": "src/environments/environment.ts"
                  }
                ],
                "buildOptimizer": false,
                "optimization": false,
                "vendorChunk": true,
                "extractLicenses": false,
                "sourceMap": true,
                "namedChunks": true
              }
            },
            "defaultConfiguration": "production"
          },
          "serve": {
            "builder": "@angular-builders/custom-webpack:dev-server",
            "configurations": {
              "production": {
                "buildTarget": "angular-comparison:build:production"
              },
              "development": {
                "buildTarget": "angular-comparison:build:development"
              }
            },
            "defaultConfiguration": "development"
          },
          "extract-i18n": {
            "builder": "@angular-devkit/build-angular:extract-i18n",
            "options": {
              "buildTarget": "angular-comparison:build"
            }
          },
          "test": {
            "builder": "@angular-builders/custom-webpack:karma",
            "options": {
              "customWebpackConfig": {
                "path": "./custom-webpack.config.js",
                "mergeStrategies": {
                  "externals": "replace"
                }
              },
              "polyfills": ["zone.js", "zone.js/testing"],
              "tsConfig": "tsconfig.spec.json",
              "assets": ["src/favicon.ico", "src/assets"],
              "styles": ["src/styles/styles.css"],
              "scripts": []
            }
          },
          "lint": {
            "builder": "@angular-eslint/builder:lint",
            "options": {
              "lintFilePatterns": ["src/**/*.ts", "src/**/*.html"]
            }
          }
        }
      }
      ...
    }
  ...
Add the webpack.shared.config.js, webpack.dev.config.js and webpack.prod.config.js files to your project root directory; this is the folder that contains you angular.json file.
webpack.shared.config.js
  const path = require('path');

// Register ts-node to transpile environments TypeScript file
require('ts-node').register({
  transpileOnly: true,
  compilerOptions: {
    module: 'commonjs'
  }
});

module.exports = {
  module: {
    rules: [
      {
        test: /\.(png|jpe?g|gif)$/i,
        use: [
          {
            loader: 'file-loader',
          },
        ],
      },
      {
        test: /\.svg$/,
        use: [
          {
            loader: 'svg-url-loader',
            options: {},
          },
        ],
      },
    ],
  },
  resolve: {
    alias: {
      'foundationZero/ZeroDesignSystem': path.resolve(
        __dirname,
        'node_modules/@genesislcap/foundation-zero',
      ),
    },
  },
};
webpack.dev.config.js
const webpackSharedConfig = require('./webpack.shared.config');
const { DefinePlugin } = require('webpack');
const environment = require('./src/environments/environment.ts').environment;
const envKeys = Object.keys(environment).reduce((prev, next) => {
  prev[next] = JSON.stringify(environment[next]);
  return prev;
}, {});

module.exports = {
  ...webpackSharedConfig,
  plugins: [
    new DefinePlugin(envKeys),
  ],
};
webpack.prod.config.js
const webpackSharedConfig = require('./webpack.shared.config');
const { DefinePlugin } = require('webpack');
const environment = require('./src/environments/environment.prod.ts').environment;
const envKeys = Object.keys(environment).reduce((prev, next) => {
  prev[next] = JSON.stringify(environment[next]);
  return prev;
}, {});

module.exports = {
  ...webpackSharedConfig,
  plugins: [
    new DefinePlugin(envKeys),
  ],
};
Update tsconfig.json
In your tsconfig.json update the compilerOptions section and set the following properties to true.
{
  ...
  "compilerOptions": {
    ...
    "skipLibCheck": true,
    "esModuleInterop": true,
    "resolveJsonModule": true
  },
  ...
}
Update tsconfig.app.json
Ensure the include section references the globals.d.ts file.
/* To learn more about this file see: https://angular.io/config/tsconfig. */
{
  "extends": "./tsconfig.json",
  "compilerOptions": {
    "outDir": "./out-tsc/app",
    "types": []
  },
  "files": [
    "src/main.ts"
  ],
  "include": [
    "src/**/*.d.ts",
    "globals.d.ts"
  ]
}
Add app.config.ts
In your src/app folder add the app.config.ts file. This will contain some util methods and config values used in other parts of the app.
import type { MainMenu } from './types/menu'
import type { LayoutComponentName } from './types/layout';
import { AUTH_PATH } from './app-routing.module';

export const layoutComponentName = {
  default: 'DefaultLayoutComponent',
  blank: 'BlankLayoutComponent',
};

export const layoutComponentImportsByName = {
  [layoutComponentName.default]: () =>
    import('./layouts/default/default.layout').then((m) => m.DefaultLayoutComponent),
  [layoutComponentName.blank]: () =>
    import('./layouts/blank/blank.layout').then((m) => m.BlankLayoutComponent),
};

export const layoutNameByRouteMap: Map<string, LayoutComponentName> = new Map([
  [`/${AUTH_PATH}`, layoutComponentName.blank],
]);

export const mainMenu: MainMenu = [
];
Update (or add) app.module.ts
In src/app, update your app module to declare the layout components, the lazy load directive, and to add the custom elements schema. This enables your angular application to recognise web components.
import { CUSTOM_ELEMENTS_SCHEMA, NgModule } from '@angular/core';
import { BrowserModule } from '@angular/platform-browser';

import { AppRoutingModule } from './app-routing.module';
import { AppComponent } from './app.component';
import { DefaultLayoutComponent } from './layouts/default/default.layout';
import { LayoutLazyLoadDirective } from './directives/app-lazy-load.directive';
import { BlankLayoutComponent } from './layouts/blank/blank.layout';
import { HomeComponent } from './pages/home/home.component';
import { AuthLoginComponent } from './pages/auth-login/auth-login.component';

@NgModule({
  declarations: [
    AppComponent,
    DefaultLayoutComponent,
    BlankLayoutComponent,
    LayoutLazyLoadDirective,
    HomeComponent,
    AuthLoginComponent,
  ],
  imports: [
    BrowserModule,
    AppRoutingModule
  ],
  providers: [],
  bootstrap: [AppComponent],
  schemas: [CUSTOM_ELEMENTS_SCHEMA ]
})
export class AppModule { }
Update main.ts
In the src folder, update the main.ts file.
import { platformBrowserDynamic } from '@angular/platform-browser-dynamic';

import { AppModule } from './app/app.module';


platformBrowserDynamic().bootstrapModule(AppModule)
  .catch(err => console.error(err));
Add layouts
In src/app/layouts, add the layouts that the application uses to switch between the authentication micro front-end and the rest of the application.
Default layout
Add base.layout.ts to src/app/layouts.
import { Router } from '@angular/router';

export default class BaseLayout {
  router: Router;

  constructor(router: Router) {
    this.router = router;
  }

  navigate(path: string) {
    this.router.navigate([path]);
  }
}
Blank layout
Add the files to src/app/layouts/blank.
blank.layout.ts
import { Component, ElementRef, ViewChild, AfterViewInit } from '@angular/core';
import { configureDesignSystem } from '@genesislcap/foundation-ui';
import * as designTokens from '../../../styles/design-tokens.json';

@Component({
  selector: 'app-blank-layout',
  templateUrl: './blank.layout.html',
  styleUrls: ['./blank.layout.css'],
})
export class BlankLayoutComponent implements AfterViewInit {
  @ViewChild('designSystemProvider') designSystemProviderElement!: ElementRef;

  ngAfterViewInit() {
    configureDesignSystem(this.designSystemProviderElement.nativeElement, designTokens);
  }
}
blank.layout.html
<rapid-design-system-provider #designSystemProvider>
  <section class="content">
    <router-outlet></router-outlet>
    <app-messages></app-messages>
  </section>
</rapid-design-system-provider>
blank.layout.css
rapid-design-system-provider {
  height: 100%;
  background-color: var(--neutral-fill-stealth-active);
  color: var(--neutral-foreground-rest);
}

.content {
  position: absolute;
  width: 100%;
  height: 100%;
}
Default layout
Add the files to src/app/layouts/default.
default.layout.ts
import { Component, ViewChild, ElementRef, AfterViewInit } from '@angular/core';
import { Router } from '@angular/router';
import { baseLayerLuminance, StandardLuminance } from '@microsoft/fast-components';
import { configureDesignSystem } from '@genesislcap/foundation-ui';
import * as designTokens from '../../../styles/design-tokens.json';
import BaseLayout from '../base.layout';
import { mainMenu } from '../../app.config';

@Component({
  selector: 'app-default-layout',
  templateUrl: './default.layout.html',
  styleUrls: ['./default.layout.css'],
})
export class DefaultLayoutComponent extends BaseLayout implements AfterViewInit {
  @ViewChild('designSystemProvider') designSystemProviderElement!: ElementRef;
  allRoutes = mainMenu;

  constructor(
    router: Router,
  ) {
    super(router);
  }

  ngAfterViewInit() {
    configureDesignSystem(this.designSystemProviderElement.nativeElement, designTokens);
  }

  navigateAngular = (path: string) => {
    this.router.navigate([path]);
  };

  onLuminanceToogle = (): void => {
    baseLayerLuminance.setValueFor(
      this.designSystemProviderElement.nativeElement,
      baseLayerLuminance.getValueFor(this.designSystemProviderElement.nativeElement) ===
        StandardLuminance.DarkMode
        ? StandardLuminance.LightMode
        : StandardLuminance.DarkMode,
    );
  };
}
default.layout.html
<rapid-design-system-provider #designSystemProvider>
  <foundation-header
    #foundationHeader
    show-luminance-toggle-button
    show-misc-toggle-button
    (luminance-icon-clicked)="onLuminanceToogle()"
    [navigateTo]="navigateAngular"
  >
    <section class="routes-wrapper" slot="routes">
      <rapid-button *ngFor="let menuLink of allRoutes" (click)="navigate(menuLink.path)" >
        <rapid-icon name="\{{ menuLink.icon }}"></rapid-icon>
        \{{ menuLink.title }}
      </rapid-button>
    </section>
  </foundation-header>
  <section class="content">
    <router-outlet></router-outlet>
    <app-messages></app-messages>
  </section>
</rapid-design-system-provider>
default.layout.scss
:host {
  display: flex;
  flex-direction: column;
  height: 100%;
}

.container {
  position: relative;
  height: 100%;
}

rapid-design-system-provider {
  height: 100%;
  display: flex;
  flex-direction: column;
  background-color: var(--neutral-fill-stealth-active);
  color: var(--neutral-foreground-rest);
  overflow: hidden;
}

foundation-header {
  z-index: 999;
  position: absolute;
  top: 0px;
  left: 0px;
  width: 100%;
  align-items: center;
  border: none;
}

foundation-header::part(background) {
  box-sizing: border-box;
}

.routes-wrapper {
  display: flex;
  gap: calc(var(--design-unit) * 2px);
}

.content {
  width: 100%;
  flex-grow: 1;
  position: absolute;
  top: 0;
  bottom: 0;
  left: 0;
  right: 0;
  padding-top: var(--nav-height);
}
Add Services
In the services folder (usually called app/src/services), create a new service called auth.service.ts:
import { Injectable } from '@angular/core';
import { Auth } from '@genesislcap/foundation-comms';
import {DI} from "@microsoft/fast-foundation";

@Injectable({
  providedIn: 'root',
})
export class AuthService {

  async isUserAuthenticated(): Promise<boolean> {
    const auth: Auth = DI.getOrCreateDOMContainer().get(Auth);
    return auth.isLoggedIn
  }
}
Add directives
In your directives folder (usually called app/src/directives), create a new directive called app-lazy-load.directive.ts:
import {
  Directive,
  ViewContainerRef,
  Input,
  OnInit,
  OnChanges,
  SimpleChanges,
} from '@angular/core';
import { layoutComponentImportsByName } from '../app.config';
@Directive({
  selector: '[appLayoutLazyLoad]',
})
export class LayoutLazyLoadDirective implements OnInit, OnChanges {
  @Input('appLayoutLazyLoad') componentName?: string;

  constructor(private viewContainerRef: ViewContainerRef) {}

  ngOnInit() {
    this.loadComponent();
  }

  ngOnChanges({ componentName }: SimpleChanges) {
    const currentValue = componentName?.currentValue;
    const previousValue = componentName?.previousValue;

    if (currentValue && currentValue !== previousValue) {
      this.loadComponent();
    }
  }

  async loadComponent() {
    this.viewContainerRef.clear();

    if (!this.componentName) {
      return;
    }

    if (!layoutComponentImportsByName[this.componentName]) {
      console.error(`Unknown component name: ${this.componentName}`);
    }

    const component = await layoutComponentImportsByName[this.componentName]();
    this.viewContainerRef.createComponent(component);
  }
}
Add guards
In your guards folder, (usaully called app/src/guards), add a route guard auth.guard.ts. This sets up the Genesis auth service in the canActivate method, so that the app can verify that the user is authenticated.
import { Injectable } from '@angular/core';
import { CanActivate, Router } from '@angular/router';
import { AuthService } from '../services/auth.service';
import { AUTH_PATH } from '../app-routing.module';

@Injectable({
  providedIn: 'root',
})
export class AuthGuard implements CanActivate {
  constructor(
    private authService: AuthService,
    private router: Router,
  ) {}

  async canActivate(): Promise<boolean> {
    const isUserAuthenticated = await this.authService.isUserAuthenticated();

    if (!isUserAuthenticated) {
      await this.router.navigate([`/${AUTH_PATH}`]);
      return false;
    }
    return true;
  }
}
Add a home component (optional)
Add a home component to src/app/home. If you already have other components that the router redirects to after login, you might not need to do this step.
This example contains an implementation of the GridPro component in FoundationLayout containers. The Genesis back end must be configured with data-server endpoints queries for ALL_POSITIONS and ALL_TRADES to see data in the grids.
import { Component } from '@angular/core';

@Component({
  selector: 'app-home',
  template: '
    <rapid-layout>
      <rapid-layout-region type='horizontal'>
        <rapid-layout-item>
          <rapid-grid-pro auto-cell-renderer-by-type style="display: block; height: 300px;">
            <grid-pro-genesis-datasource resource-name="ALL_POSITIONS"></grid-pro-genesis-datasource>
          </rapid-grid-pro>
        </rapid-layout-item>
        <rapid-layout-item>
          <rapid-grid-pro auto-cell-renderer-by-type style="display: block; height: 300px;">
            <grid-pro-genesis-datasource resource-name="ALL_TRADES"></grid-pro-genesis-datasource>
          </rapid-grid-pro>
        </rapid-layout-item>
      </rapid-layout-region>
    </rapid-layout>
  ',
})
export class HomeComponent {
}
Adding the auth login component
In your pages folder, (usually called app/src/pages), add a folder for the auth-login component and add the following files.
auth.login.component.css
:host {
  height: 100%;
  width: 100%;
}
auth.login.component.ts
import { Component } from '@angular/core';

@Component({
  selector: 'app-auth-login',
  templateUrl: './auth-login.component.html',
  styleUrl: './auth-login.component.css',
})
export class AuthLoginComponent {
}
auth.login.component.html
Add the auth login template. Note that the client-app-login is a web component, so you won't find it in your angular components.
<client-app-login></client-app-login>
Add share folder
Add a folder src/app/share. This is where we import the code that bootstraps the Genesis framework. In this example, we have included the base set of web components from our framework as well as the Entity Management, Grid Pro, Foundation Layout and Charts components.
Add the following files to the new folder.
foundation-login.ts
This file contains functions to bootstrap our authentication micro front-end. They will be used in your app.component.ts.
import {configure, define} from '@genesislcap/foundation-login';
import type { Router } from '@angular/router';
import { AUTH_PATH } from '../app-routing.module';
import { DI } from '@microsoft/fast-foundation';

const ssoSettings =
  typeof GENX_ENABLE_SSO !== 'undefined' && GENX_ENABLE_SSO === true
    ? {
        autoAuth: true,
        sso: {
          toggled: true,
          identityProvidersPath: 'sso/list',
        },
      }
    : {};

/**
 * Configure the micro frontend
 */
export const configureFoundationLogin = ({
  router,
}: {
  router: Router;
}) => {
  configure(DI.getOrCreateDOMContainer(), {
    showConnectionIndicator: true,
    hostPath: AUTH_PATH,
    redirectHandler: () => {
      router.navigate(['home'])
    },
    ...ssoSettings,
  });

  return define({
    name: `client-app-login`,
  });
}
genesis-components.ts
In this file, the web components from Genesis are imported and bootstrapped.
import { configure as configureHeader } from '@genesislcap/foundation-header/config';
import { foundationLayoutComponents } from '@genesislcap/foundation-layout';
import { EntityManagement } from '@genesislcap/foundation-entity-management';
import { g2plotChartsComponents } from '@genesislcap/g2plot-chart';
import * as rapidDesignSystem from '@genesislcap/rapid-design-system';
import { rapidGridComponents } from '@genesislcap/rapid-grid-pro';

EntityManagement;

configureHeader({
  templateOptions: {
    provider: 'template',
     icon: 'rapid-icon',
     button: 'rapid-button',
     connectionIndicator: 'rapid-connection-indicator',
     select: 'rapid-select',
     option: 'rapid-option',
     flyout: 'rapid-flyout',
  },
});

rapidDesignSystem
  .provideDesignSystem()
  .register(
     rapidDesignSystem.baseComponents,
     rapidGridComponents,
     g2plotChartsComponents,
     foundationLayoutComponents,
  );
Types
In the src/app/types folder, add the types that are used by the Genesis header and layouts.
layout.ts
import { layoutComponentName } from '../app.config';

export type LayoutComponentName =
  | typeof layoutComponentName.default
  | typeof layoutComponentName.blank;
menu.ts
export type MainMenuLink = {
  index: number;
  path: string;
  title: string;
  icon: string;
  variant?: string;
};
export type MainMenu = MainMenuLink[];
Utils
In the src/app/utils folder, add the following file.
getLayoutNameByRoute.ts
This is a simple function that returns the layout name based on the current route. It switches between the blank layout - which shows the authentication micro front-end - and the default layout for the rest of your application.
import { layoutComponentName, layoutNameByRouteMap } from '../app.config';
import { LayoutComponentName } from '../types/layout';

const getLayoutNameByRoute = (route: string): LayoutComponentName => {
  const currentLayoutName = layoutNameByRouteMap.get(route);

  if (currentLayoutName) {
    return currentLayoutName;
  }

  return layoutComponentName.default;
};

export default getLayoutNameByRoute;
Environment files
Update (or add if you don't have them) the environment files in src/environment to contain the following properties: API_HOST, PORT, GENX_ENABLE_SSO.
environment.ts
export const environment = {
  production: false,
  API_HOST: 'localhost',
  PORT: 6060,
  GENX_ENABLE_SSO: true
};
environment.prod.ts
export const environment = {
  production: true,
  PORT: 6060,
  GENX_ENABLE_SSO: true
};
Base styles
You need to add the following base styles to src/styles.
styles.css
@font-face {
  font-family: Segoe UI;
  font-weight: 300;
  src: local("Segoe UI Semilight"), local("Segoe UI");
}

* {
  font-family: "Segoe UI", "Helvetica Neue", Arial, sans-serif;
  font-style: normal;
  font-weight: normal;
}

html,
body {
  width: 100%;
  height: 100%;
  padding: 0;
  margin: 0;

  --nav-height: 60px;
}

rapid-design-system-provider,
.dynamic-template,
foundation-router {
  display: flex;
  width: 100%;
  height: 100%;
}
design-tokens.json
Add the design-tokens.json to src/styles.
The Genesis Framework allows you to customise the design sytem for rapid - colours, margins, widths, font-sizes etc. Here is an example, but you can create your own one here.
{
  "design_tokens": {
    "color": {
      "accent": {
        "$value": "#0EAFE2",
        "$type": "color"
      },
      "neutral": {
        "$value": "#7C909B",
        "$type": "color"
      }
    },
    "fontFamily": {
      "bodyFont": {
        "$value": "Roboto, \"Segoe UI\", Arial, Helvetica, sans-serif",
        "$type": "fontFamily"
      }
    },
    "typography": {
      "baseFontSize": {
        "$value": "14px",
        "$type": "dimension"
      },
      "baseLineHeight": {
        "$value": "20px",
        "$type": "dimension"
      }
    },
    "mode": {
      "luminance": {
        "$value": 0.23,
        "$type": "number"
      }
    },
    "style": {
      "density": {
        "$value": 0,
        "$type": "number"
      },
      "borderRadius": {
        "$value": 4,
        "$type": "number"
      },
      "strokeWidth": {
        "$value": 1,
        "$type": "number"
      }
    },
    "space": {
      "designUnit": {
        "$value": 4,
        "$type": "number"
      }
    }
  }
}
Globals file
In the root folder of your application, update (or add if there isn't one already) the globals.d.ts file with API_HOST and GENX_ENABLE_SSO so that your typescript compiler knows they are global variables.
The value for API_HOST is used for connecting to the Genesis back end. The value for GENX_ENABLE_SSO conditionally enables logging in via an SSO provider.
declare global {
  const API_HOST: string;
  const GENX_ENABLE_SSO: boolean;
}

export {};
Update your app.component.html and app.component.ts` files
In the constructor of the app.component.ts, call the configureFoundationLogin function as shown below and subscribe to router changes to set the correct value for the layoutName.
This configures the foundation login micro front-end.
import { Component } from '@angular/core';

import './share/genesis-components';
import { NavigationEnd, Router } from '@angular/router';
import { configureFoundationLogin } from './share/foundation-login';
import { LayoutComponentName } from './types/layout';
import getLayoutNameByRoute from './utils/getLayoutNameByRoute';

@Component({
  selector: 'app-root',
  templateUrl: './app.component.html',
})
export class AppComponent {
  title = 'angular-comparison';

  layoutName?: LayoutComponentName;

  constructor(
    private router: Router,
  ) {
    configureFoundationLogin({ router });
    // Set layout component based on route
    router.events.subscribe((event: any) => {
      if (event instanceof NavigationEnd) {
        this.layoutName = getLayoutNameByRoute(event.urlAfterRedirects);
      }
    });
  }
}
Update your app.component.html template file to use the LayoutLazyLoadDirective directive. This takes the layoutName property and passes it to the directive that switches between BlankLayoutComponent and DefaultLayoutComponent layouts.
<ng-container *appLayoutLazyLoad="layoutName"></ng-container>
App routing module
Finally, update your routing module. In most cases, this is called app-routing.module. You need to add routes for the authentication micro front-end.
import { NgModule } from '@angular/core';
import { RouterModule, Routes } from '@angular/router';
import { AuthLoginComponent } from './pages/auth-login/auth-login.component';
import { HomeComponent } from './components/home/home.component';
import { AuthGuard } from './guards/auth.guard';

export const AUTH_PATH = 'login'

const routes: Routes = [
  {
    path: '',
    redirectTo: `${AUTH_PATH}`,
    pathMatch: 'full',
  },
  {
    path: `${AUTH_PATH}`,
    component: AuthLoginComponent,
  },
  {
    path: 'home',
    canActivate: [ AuthGuard ],
    component: HomeComponent // or whatever your logged in component is called,
  }
];

@NgModule({
  imports: [RouterModule.forRoot(routes)],
  exports: [RouterModule]
})
export class AppRoutingModule { }
Run your application
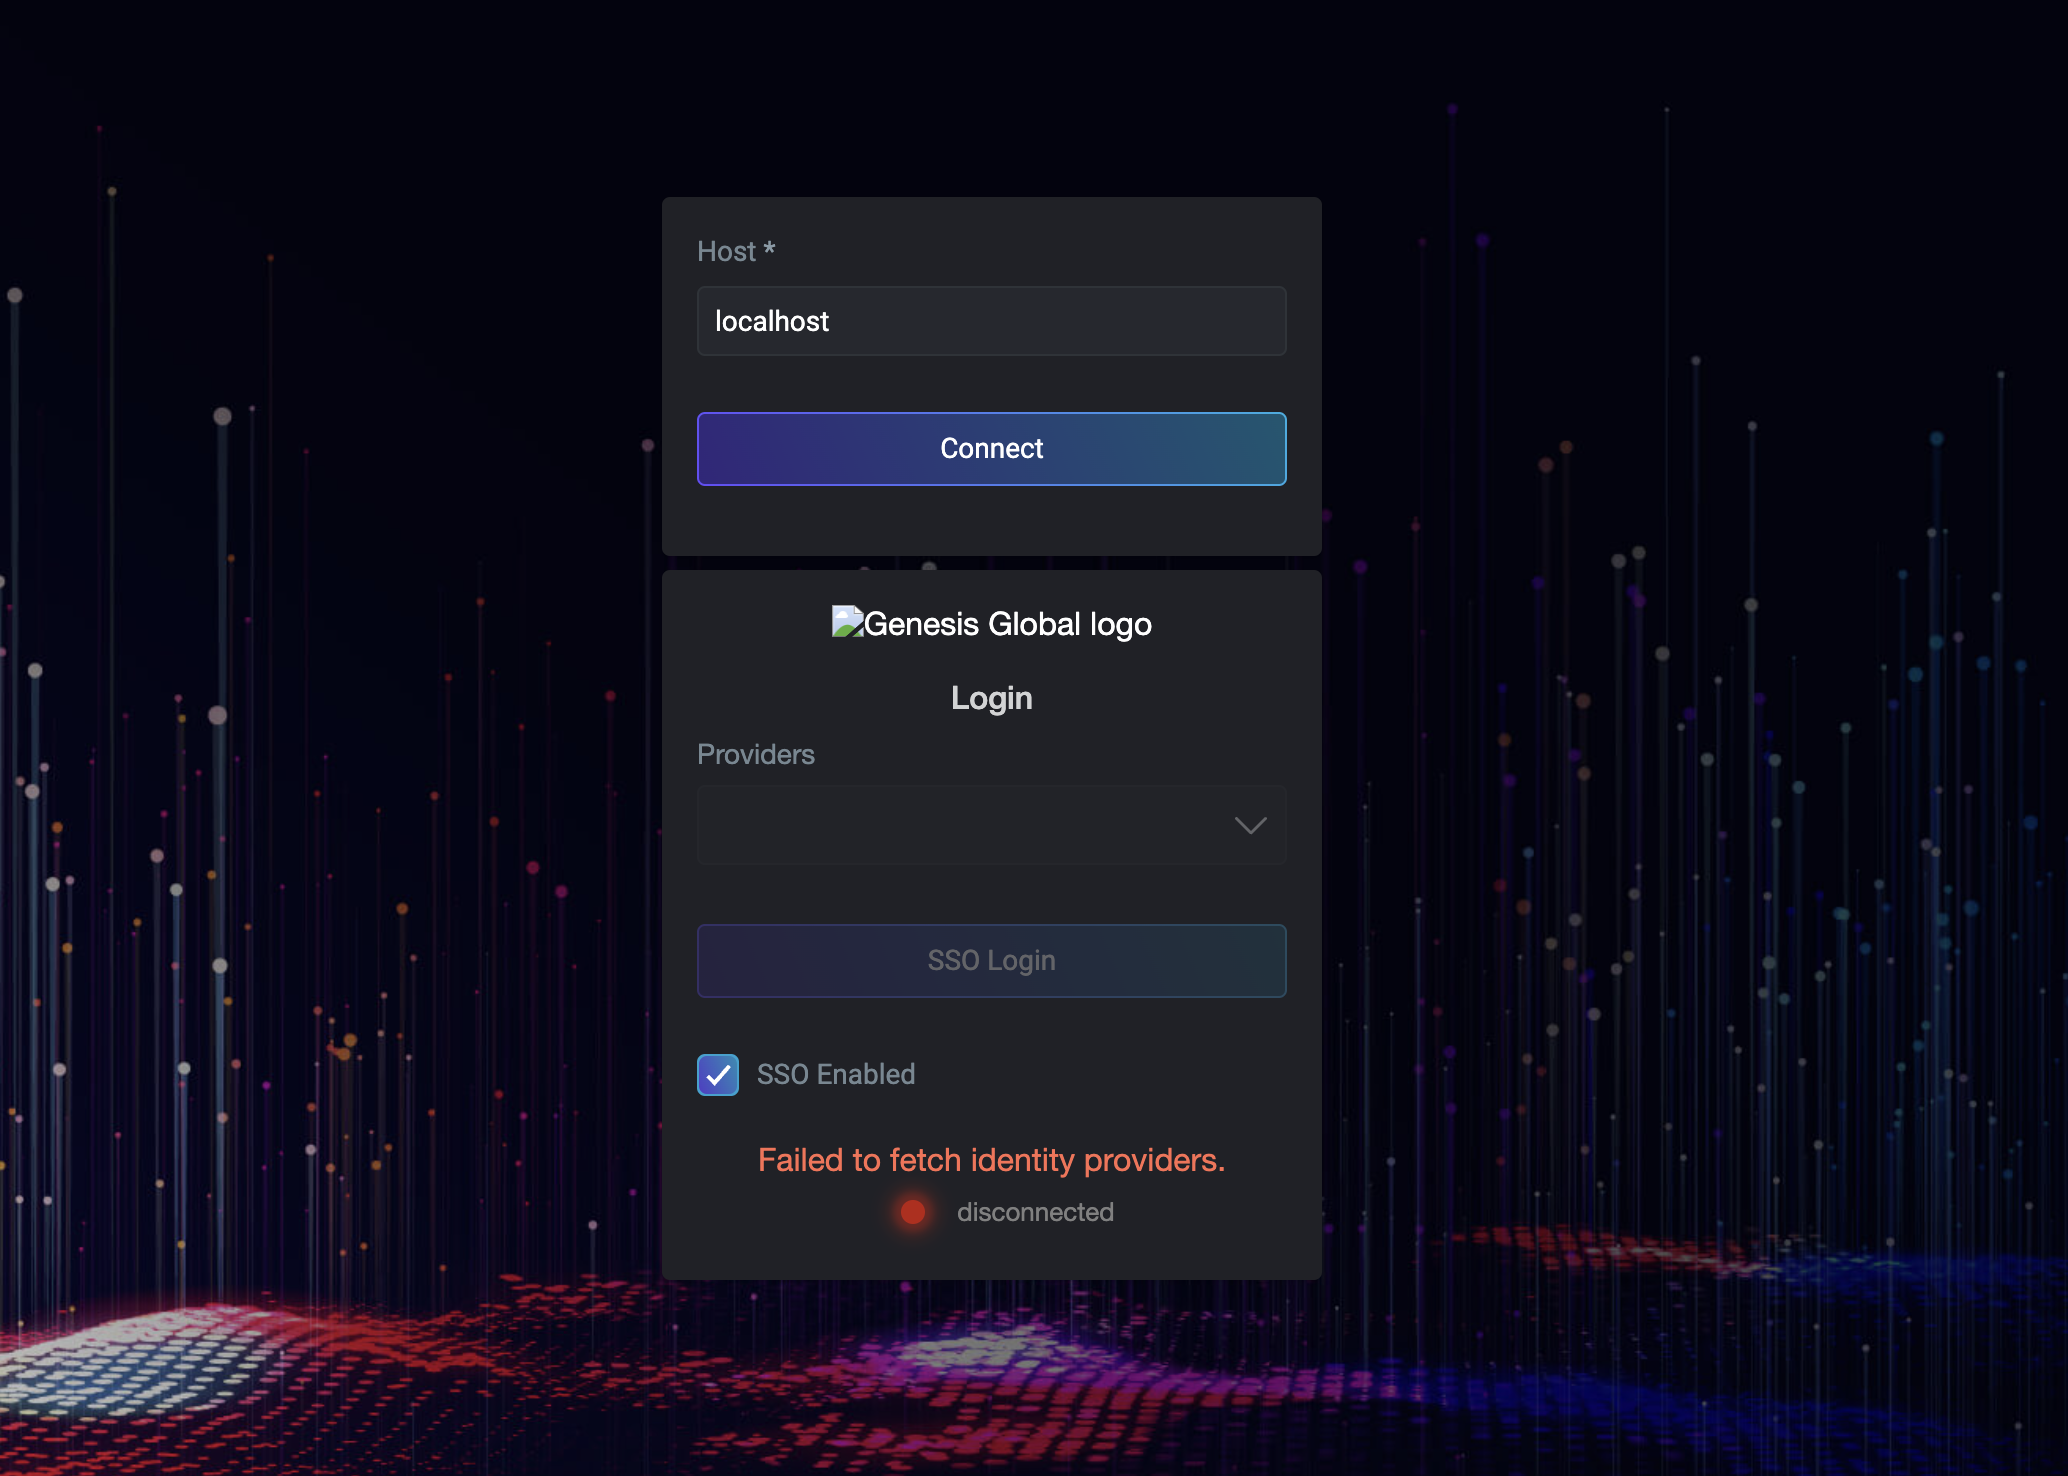
To build and serve your angular application, run ng serve in your root directory.
If everything is working correctly, you will see the authentication micro front-end. Specify your back-end end point in the Host input field.