Day three
Day two recap
This day covers:
Views
When you set up a data model, it implies relationships between tables. For example, a TRADE has a COUNTERPARTY_ID and an INSTRUMENT_ID. That means it has a relationship with the COUNTERPARTY and INSTRUMENTS tables.
Views enable you to join related tables to create a single holistic view.
In short, Views are the genesis equivalent of SQL select queries. Unlike tables, views do not have any data of their own, they are read-only, but present a view based on one or more tables.
A view always starts with a single table, the root table. Other tables can be joined onto the root table to present composite data.
Views are very powerful and in this training we're going to cover just the basics. When you have a chance, try to look at the documentation.
Entities
During code generation, view and index entities will be generated from the definitions in your application's view-dictionary.kts file. The name of each entity will be the same as the definition, but it is converted from snake case to camel case; for example, VIEW_NAME becomes ViewName.
The generated entities are kotlin data classes and can be built using the primary constructor (so you can also import Views in your Java/Kotlin code as well). Just before the object is built, it is validated to make sure all required fields have been set.
Usage
Create an alpha-view-dictionary.kts file inside the folder server/alpha-app/src/main/genesis/cfg/.
The example below creates a view called TRADE_VIEW, which joins the TRADE table to the INSTRUMENT table. Edit the alpha–view-dictionary.kts file and add a view on the TRADE table:
views {

  view("TRADE_VIEW", TRADE) {

    joins {
      joining(INSTRUMENT) {
        on(TRADE.INSTRUMENT_ID to INSTRUMENT { INSTRUMENT_ID })
      }
    }

    fields {
      TRADE.allFields()

      INSTRUMENT.INSTRUMENT_NAME
      INSTRUMENT.MARKET_ID withPrefix INSTRUMENT
      INSTRUMENT.CURRENCY_ID withAlias "CURRENCY"
    }
  }
}
withPrefix and withAliaswithPrefix adds a prefix to the standard field name. For example, INSTRUMENT.MARKET_ID withPrefix SYMBOL becomes SYMBOL_MARKET_ID.
withAlias gives the field an alternative name for the view.
More info here.
Now go to the Data Server definition (open alpha-dataserver.kts). Replace the ALL_TRADES query in the Data Server with the new TRADE_VIEW.
dataServer {
     query("ALL_TRADES", TRADE_VIEW)
     ...
}
In the example above, you are exposing a view through a Data Server query. It's also possible to inject a view into a Request Server or even your Event Handler code. This makes it easier to access complex data from multiple tables in your Kotlin or Java code. Look at package global.genesis.gen.view.repository.
Run build and deploy, and test the view with Postman or Console.
Exercise 3.1: using views
30 mins
Extend the TRADE_VIEW to connect TRADE to COUNTERPARTY:
- Add the respective join (as we did with
INSTRUMENT). - Add the field
COUNTERPARTY.COUNTERPARTY_NAME. - Test it.
Extending our application further
Moving on, for our app to be able to keep positions based on the trades, we now need to extend our data model.
Adding new fields
Let's add new fields to the Trade table.
fields {
    ...
    field("TRADE_DATE", type = DATE)
    field("ENTERED_BY", type = STRING)
    field(name = "TRADE_STATUS", type = ENUM("NEW", "ALLOCATED", "CANCELLED", default = "NEW"))
}
tables {

    table (name = "TRADE", id = 2000) {
        ...
        TRADE_DATE
        ENTERED_BY
        TRADE_STATUS

        primaryKey {
            TRADE_ID
        }
    }
    ...
}
And new fields to create the POSITION and INSTRUMENT_PRICE tables:
fields {
    ...
    field("POSITION_ID", type = STRING)
    field("NOTIONAL", type = DOUBLE)
    field("LAST_PRICE", type = DOUBLE)
    field("VALUE", type = DOUBLE)
    field("PNL", type = DOUBLE)
}
When you finish, remember to run generatefields.
Updating the schemas.ts
After creating these new fields, go back to the schemas.ts and add this code blocks to it. so we can interact with them.
const conditionalSchemaEntry = (predicate: boolean, entry) => {
  return predicate ? [entry] : [];
};

export const tradeFormSchema = (editing?: boolean) => ({
    ...
	{
		"type": "Control",
		"label": "Counterparty",
		"scope": "#/properties/COUNTERPARTY_ID",
        "options": {
            allOptionsResourceName: "ALL_COUNTERPARTIES",
            valueField: "COUNTERPARTY_ID",
            labelField: "COUNTERPARTY_NAME",
            data: null,
        },
	},
    ...
    {
        "type": "Control",
        "label": "Trade Date",
        "scope": "#/properties/TRADE_DATE"
    },
    {
        "type": "Control",
        "label": "Status",
        "scope": "#/properties/TRADE_STATUS"
    },
    {
        "type": "Control",
        "label": "Entered By",
        "scope": "#/properties/ENTERED_BY"
    }

  ],
});

export const tradeFormCreateSchema = tradeFormSchema(false);
export const tradeFormUpdateSchema = tradeFormSchema(true);
Extending the Trade table and adding a Position table
-
Add the new fields into the TRADE table.
-
Then create the POSITION and INSTRUMENT_PRICE tables.
tables {
    ...
    table(name = "POSITION", id = 2003) {
        sequence(POSITION_ID, "PS") //autogenerated sequence
        INSTRUMENT_ID not null
        QUANTITY
        NOTIONAL
        VALUE
        PNL

        primaryKey {
            POSITION_ID
        }
        indices {
            unique {
                INSTRUMENT_ID
            }
        }
    }
}
tables {
    ...
    table(name = "INSTRUMENT_PRICE", id = 2004) {
        INSTRUMENT_ID
        LAST_PRICE
        primaryKey {
            INSTRUMENT_ID
        }
    }
}
When you finish, remember to run generatedao and build and deploy.
As we have previously generated the fields, autocompletion helps you to define the tables more quickly, and with fewer errors. Also note that Genesis provides several autogenerated primary keys: sequence, uuid, autoIncrement.
Automated testing
So far we have been testing our work manually, using Genesis Console or some HTTP client. Now the time has come to start writing some automated tests for our application. We are going to test our TradeView and the Trade insert method we created.
Configuration�
To test our classes we need to mock the database, as there are integrations and configurations managed by Genesis behind the scenes. To avoid any additional installation locally, we shall use the H2 in-memory database.
You already have the configuration needed if you cloned the Developer Training starting repo from here. Otherwise, change the server/alpha-app/build.gradle.kts configuration for the tests tasks to match the code below.
dependencies {
    compileOnly(genesis("script-dependencies"))
    genesisGeneratedCode(withTestDependency = true)
    testImplementation("global.genesis:genesis-dbtest-junit4")
    testImplementation("global.genesis:genesis-testsupport-junit4")
    testImplementation("global.genesis:genesis-dataserver2")
    testImplementation("global.genesis:genesis-pal-dataserver")
}
Adding Testing: AlphaTradeViewTest
Let's create an automated test that inserts and retrieves some data using the platform's automated test support components. We are extending the class AbstractDatabaseTest to allow a proper integration testing, as well as using the TradeView we created to assert results.
In summary, the new test will:
- load the necessary data inputs from a CSV file
- retrieve data using Genesis Database API
So, first, let's do the following:
- Create a new folder called test/kotlin under the server/alpha-app/src/
- Add a new package called global.genesis to the test/kotlin/ directory.
- Add a new test class called
AlphaTradeViewTest.kt. - Add a new package called resources.data.
- Add TEST_DATA_VIEW.csv to that package (/server/alpha-app/src/test/kotlin/resources/data).
#INSTRUMENT
INSTRUMENT_ID,INSTRUMENT_NAME
1,FOO.L
2,BAR.L
#COUNTERPARTY
COUNTERPARTY_ID,COUNTERPARTY_LEI,COUNTERPARTY_NAME,
1,335800A8HK6JBITVPA30,Test Ltd,
2,655FG0324Q4LUVJJMS11,Testing AG,
The directory tree should look like this:
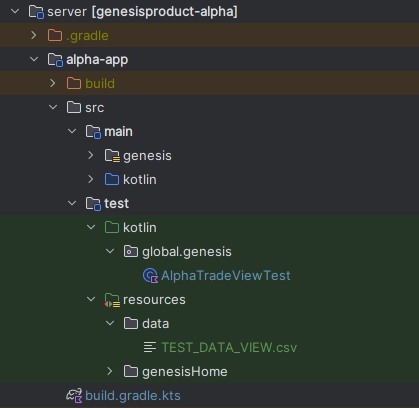
The test class should look like this:
package global.genesis
import global.genesis.db.util.AbstractDatabaseTest
import global.genesis.db.util.TestUtil
import global.genesis.dictionary.GenesisDictionary
import global.genesis.gen.dao.Trade
import global.genesis.gen.dao.enums.Direction
import global.genesis.gen.view.entity.TradeView
import global.genesis.gen.view.repository.TradeViewAsyncRepository
import kotlinx.coroutines.flow.count
import kotlinx.coroutines.flow.toList
import kotlinx.coroutines.runBlocking
import org.joda.time.DateTime
import org.junit.jupiter.api.Assertions.assertEquals
import org.junit.jupiter.api.BeforeEach
import org.junit.jupiter.api.Test
import javax.inject.Inject

class AlphaTradeViewTest : AbstractDatabaseTest() {
    @Inject
    lateinit var enhancedTradeViewRepository: TradeViewAsyncRepository

    override fun createMockDictionary(): GenesisDictionary = prodDictionary()

    @BeforeEach
    fun setup() {
        TestUtil.loadData(resolvePath("data/TEST_DATA_VIEW.csv"), rxDb)
    }
    private fun buildTrade(tradeId: String, now: DateTime = DateTime.now()) =
        Trade.builder()
            .setTradeDate(now)
            .setCounterpartyId("2") // COUNTERPARTY_NAME = "Testing AG"
            .setInstrumentId("2")   // INSTRUMENT_NAME = "BAR.L"
            .setPrice(12.0)
            .setQuantity(100)
            .setDirection(Direction.BUY)
            .setTradeId(tradeId)
            .build()

    @Test
    fun test_get_single_trade_by_id() = runBlocking {
        val now = DateTime.now()
        val trade = buildTrade("1L", now)
        rxEntityDb.insert(trade).blockingGet()
        val tradeView = enhancedTradeViewRepository.get(TradeView.ById("1"))
        if (tradeView != null) {
            assertEquals("Testing AG", tradeView.counterpartyName)
            assertEquals("FOO.L", tradeView.instrumentName)
            assertEquals(now, tradeView.tradeDate)
            assertEquals(12.0, tradeView.price, 0.0)
            assertEquals((100).toInt(), tradeView.quantity)
            assertEquals(Direction.BUY, tradeView.direction)
        }
    }

    @Test
    fun test_with_single_trade__use_getBulk() = runBlocking {
        val now = DateTime.now()
        val trade = buildTrade("1L", now)
        rxEntityDb.insert(trade).blockingGet()
        val tradeViewList = enhancedTradeViewRepository.getBulk().toList()
        assertEquals(1, tradeViewList.size)
        val tradeView = tradeViewList.first()
        assertEquals("Testing AG", tradeView.counterpartyName)
        assertEquals("BAR.L", tradeView.instrumentName)
        assertEquals(now, tradeView.tradeDate)
        assertEquals(12.0, tradeView.price, 0.0)
        assertEquals((100).toInt(), tradeView.quantity)
        assertEquals(Direction.BUY, tradeView.direction)
    }

    @Test
    fun test_get_multiple_trades() = runBlocking {
        rxEntityDb.insertAll(
            buildTrade("1T"),
            buildTrade("2T"),
            buildTrade("3T"),
            buildTrade("4T"),
            buildTrade("5T"),
        ).blockingGet()
        val count = enhancedTradeViewRepository.getBulk().count()
        assertEquals(5, count)
    }
}
You can run the test from IntelliJ by right-clicking on the test class and selecting Run AlphaTradeViewTest or from the command line.
Adding Testing: AlphaEventHandlerTest
Now we will add a new automated test for checking the Trade insert method that we created. We are extending the class AbstractGenesisTestSupport to allow proper integration testing. In summary, the new test will:
- load the necessary data inputs from a CSV file
- use the network API Genesis MessageClient to call the Event Handler methods.
- retrieve data using Genesis Database API
So, first, let's do the following:
- Add a new test class to the package server/alpha-app/src/test/kotlin/global/genesis/ called
AlphaEventHandlerTest.kt. - Add TEST_DATA_EVENTHANDLER.csv to a data folder (server/alpha-app/src/test/resources/data/)
#INSTRUMENT
INSTRUMENT_ID,INSTRUMENT_NAME
1,FOO.L
2,BAR.L
#COUNTERPARTY
COUNTERPARTY_ID,COUNTERPARTY_LEI,COUNTERPARTY_NAME
1,335800A8HK6JBITVPA30,Test Ltd
2,655FG0324Q4LUVJJMS11,Testing AG
#TRADE
TRADE_ID,COUNTERPARTY_ID,INSTRUMENT_ID,QUANTITY,PRICE,SYMBOL,DIRECTION,TRADE_DATE,ENTERED_BY,TRADE_STATUS
00000000001TRSP0,1,1,10,641.927,BRL,BUY,1636987969135,JaneDee,NEW
00000000002TRSP0,1,1,3,642.927,BRL,SELL,1636987969135,JaneDee,NEW
00000000003TRSP0,2,2,10,643.927,BRL,BUY,1636987969135,JaneDee,NEW
00000000004TRSP0,2,2,7,644.927,BRL,SELL,1636987969135,JaneDee,NEW
00000000005TRSP0,2,2,70,0.0,BRL,SELL,1636987969135,JaneDee,NEW
The directory tree should like this:
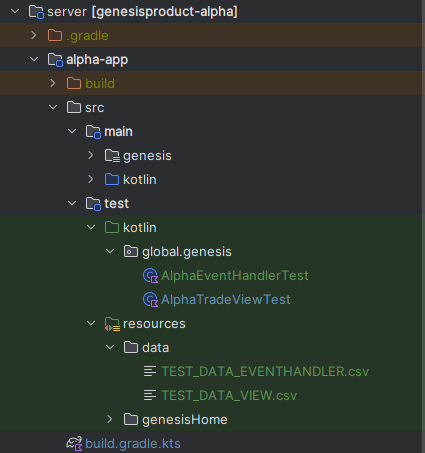
The test class should look like this:
package global.genesis

import global.genesis.commons.model.GenesisSet
import global.genesis.db.DbRecord
import global.genesis.gen.dao.Trade
import global.genesis.gen.dao.enums.Direction
import global.genesis.gen.dao.enums.TradeStatus
import global.genesis.message.core.event.Event
import global.genesis.message.core.event.EventReply
import global.genesis.testsupport.AbstractGenesisTestSupport
import global.genesis.testsupport.GenesisTestConfig
import kotlinx.coroutines.flow.toList
import kotlinx.coroutines.runBlocking
import org.joda.time.DateTime
import org.junit.jupiter.api.Assertions.*
import org.junit.jupiter.api.BeforeEach
import org.junit.jupiter.api.Test

class AlphaEventHandlerTest : AbstractGenesisTestSupport<GenesisSet>(
    GenesisTestConfig {
        packageName = "global.genesis.eventhandler.pal"
        genesisHome = "/genesisHome/"
        scriptFileName = "alpha-eventhandler.kts"
        parser = { it }
        initialDataFile = "data/TEST_DATA_EVENTHANDLER.csv"
        addAuthCacheOverride("ENTITY_VISIBILITY")
    }
) {
    override fun systemDefinition(): Map<String, Any> = mapOf("IS_SCRIPT" to "true")

    @BeforeEach
    fun setUp() {
        authorise("ENTITY_VISIBILITY", "1", "JaneDee")

        val trader = DbRecord.dbRecord("RIGHT_SUMMARY") {
            "USER_NAME" with "JaneDee"
            "RIGHT_CODE" with "INSERT_TRADE"
        }
        rxDb.insert(trader).blockingGet()
    }

    @Test
    fun `test insert trade`(): Unit = runBlocking {
        val message = Event(
            details = Trade {
                counterpartyId = "1"
                instrumentId = "2"
                direction = Direction.BUY
                price = 1.123
                quantity = 1000
                enteredBy = "JohnDoe"
                tradeDate = DateTime.now()
            },
            messageType = "EVENT_TRADE_INSERT",
            userName = "JaneDee"
        )

        val result: EventReply? = messageClient.suspendRequest(message)

        result.assertedCast<EventReply.EventAck>()
        val trades = entityDb.getBulk<Trade>().toList()
        val trade = trades[5]
        assertNotNull(trade)
        assertEquals(6, trades.size)
        assertEquals("1", trade.counterpartyId)
        assertEquals("2", trade.instrumentId)
        assertEquals(TradeStatus.NEW, trade.tradeStatus)
        assertEquals(Direction.BUY, trade.direction)
        assertEquals(1.123, trade.price)
        assertEquals(1000, trade.quantity)
    }
}
You can run the test from IntelliJ by right-clicking on the test class and selecting Run AlphaEventHandlerTest or from the command line.
Find out more about testing
You can find out more about testing by double-checking our Component testing, Integration testing, and Unit testing pages.
Additionally, you can see more testing examples by looking at the complete source code of this training available on GitHub.
Calculated data
Derived fields are a useful way of providing calculated data, but note that you must only use fields that are in the view.
derivedField("CONSIDERATION", DOUBLE) {
    withInput(TRADE.QUANTITY, TRADE.PRICE) { QUANTITY, PRICE ->
        QUANTITY * PRICE
    }
}
Add this derivedField to your view now. The final view should look like this.
view("TRADE_VIEW", TRADE) {

    joins {
        joining(COUNTERPARTY) {
            on(TRADE.COUNTERPARTY_ID to COUNTERPARTY { COUNTERPARTY_ID })
        }
        joining(INSTRUMENT) {
            on(TRADE.INSTRUMENT_ID to INSTRUMENT { INSTRUMENT_ID })
        }
    }

    fields {
        TRADE.allFields()

        COUNTERPARTY.COUNTERPARTY_NAME
        INSTRUMENT.INSTRUMENT_NAME
        INSTRUMENT.MARKET_ID withPrefix INSTRUMENT
        INSTRUMENT.CURRENCY_ID withAlias "CURRENCY"

        derivedField("CONSIDERATION", DOUBLE) {
            withInput(TRADE.QUANTITY, TRADE.PRICE) { QUANTITY, PRICE ->
                QUANTITY * PRICE
            }
        }
    }
}
Exercise 3.2: derived fields
20 mins
Let's add a new derived field in the TRADE_VIEW now. The derived field should display ASSET_CLASS from the INSTRUMENT join. If this field is null or empty, the view should display "UNKNOWN".
After changing the files, remember to run build and deploy.
Consolidators
Consolidators perform data aggregation and calculations that can either be:
- real-time - when used as a service
- on-demand - when used as objects
Consolidators follow an SQL-like syntax:
consolidator(TRADE, ORDER) {
    select {
        ORDER {
            sum { price * quantity } into TOTAL_NOTIONAL
            count() into TRADE_COUNT
        }
    }
    groupBy { Order.ById(orderId) }
}
In the above example, we aggregate data from the TRADE table into the ORDER table. We group by orderId and we count the number of trades and sum the notional. For further details, see here.
Some features provided by Consolidators:
- Type safety
- Declarative syntax
- comprehensive built-in logging
In our case, Consolidators are a good fit for consolidating a position table from trades.
Define the position-keeping logic in the consolidator
Before defining the Consolidator, we should insert some data in the INSTRUMENT_PRICE table using using SendIt script as described here.
To insert new data properly, we need to create 2 additional files called COUNTERPARTY.csv and INSTRUMENT.csv and send it to genesis. this will populate the other two tables you will need.
Create a new file in the same folder as the USER.csv file and name it as INSTRUMENT_PRICE.csv. Copy the content below into the file that you have just created.
INSTRUMENT_ID,LAST_PRICE
1,10
Then import the local csv using the Genesis plugin as we saw here.
Make sure you settled the INSTRUMENT_ID field as not nullable in the TRADE and POSITION tables, as the consolidations will use it.
tables {
    table (name = "TRADE" ...) {
        ...
        INSTRUMENT_ID not null
        ...
    }

    table(name = "POSITION" ...) {
        ...
        INSTRUMENT_ID not null
        ...
    }
    ...
}
Add the query ALL_POSITIONS in the alpha-dataserver.kts file.
dataServer {
    ...
    query("ALL_POSITIONS", POSITION)
}
When you finish, remember to run generatedao and build and deploy.
So, let's define a alpha-consolidator.kts file inside server/alpha-app/src/main/genesis/scripts/. This is where you define the consolidator logic.
The Consolidator is going to increase or decrease the quantity for POSITION records, based on the TRADE table updates. It also needs to calculate the new notional.
import global.genesis.gen.config.tables.POSITION.NOTIONAL
import global.genesis.gen.config.tables.POSITION.QUANTITY
import global.genesis.gen.config.tables.POSITION.VALUE
import global.genesis.gen.dao.Position
import global.genesis.gen.dao.enums.Direction

consolidators {
    config {}
    consolidator("CONSOLIDATE_POSITIONS", TRADE_VIEW, POSITION) {
        config {
            logLevel = DEBUG
            logFunctions = true
        }
        select {
            sum {
                when(direction) {
                    Direction.BUY -> when(tradeStatus) {
                        TradeStatus.NEW -> quantity
                        TradeStatus.ALLOCATED -> quantity
                        TradeStatus.CANCELLED -> 0
                    }
                    Direction.SELL -> when(tradeStatus) {
                        TradeStatus.NEW -> -quantity
                        TradeStatus.ALLOCATED -> -quantity
                        TradeStatus.CANCELLED -> 0
                    }
                    else -> null
                }
            } into QUANTITY
            sum {
                val quantity = when(direction) {
                    Direction.BUY -> quantity
                    Direction.SELL -> -quantity
                    else -> 0
                }
                quantity * price
            } into VALUE
        }
        onCommit {
            val quantity = output.quantity ?: 0
            output.notional = input.price * quantity
            output.pnl = output.value - output.notional
        }
        groupBy {
            instrumentId
        } into {
            lookup {
                Position.ByInstrumentId(groupId)
            }
            build {
                Position {
                    instrumentId = groupId
                    quantity = 0
                    value = 0.0
                    pnl = 0.0
                    notional = 0.0
                }
            }
        }
    }
}
Update the system files
Update the processes.xml file
As Consolidators run on their own process, we need to add a new entry to alpha-processes.xml with the definition of the Consolidator process.
<processes>
    ...
    <process name="ALPHA_CONSOLIDATOR">
        <groupId>ALPHA</groupId>
        <start>true</start>
        <options>-Xmx256m -DRedirectStreamsToLog=true -DXSD_VALIDATE=false</options>
        <module>genesis-pal-consolidator</module>
        <package>global.genesis.pal.consolidator</package>
        <script>alpha-consolidator.kts</script>
        <description>Consolidates trades to calculate positions</description>
        <loggingLevel>DEBUG,DATADUMP_ON</loggingLevel>
        <language>pal</language>
    </process>
</processes>
Update the service-definitions.xml file
This file lists all the active services for the Positions application. You can see entries have been added automatically when the data server, request server and event handler were generated.
Add a new entry to alpha-service-definitions.xml with the consolidator details. Remember the port numbers should be free and, ideally, sequential.
<configuration>
    ...
    <service host="localhost" name="ALPHA_CONSOLIDATOR" port="11002"/>
</configuration>
Run build and deploy to verify that the new process works as expected.
UI configuring
Let's add a grid in the UI to display the Positions. We could use Entity Management again, but here we will use Grid Pro in @genesislcap/foundation-zero-grid-pro Genesis package presented in Day 2, as this approach offers more flexibility to customise the HTML and CSS.
First, open the file home.styles.ts and add the code below.
.split-layout {
    display: flex;
    flex-direction: column;
    flex: 1;
    width: 100%;
    height: 100%;
}

.top-layout {
height: 45%;
flex-direction: row;
}

.positions-card {
flex: 1;
margin: calc(var(--design-unit) * 3px);
}

.card-title {
padding: calc(var(--design-unit) * 3px);
background-color: #22272a;
font-size: 13px;
font-weight: bold;
}
Open the file home.ts and import Grid Pro and Connect. Then, add them as attributes to the Home class.
...
import {ZeroGridPro} from '@genesislcap/foundation-zero-grid-pro';
import {Connect} from '@genesislcap/foundation-comms';
...
export class Home extends FASTElement {
    @observable columns: any = COLUMNS;

    public positionsGrid!: ZeroGridPro;

    @Connect connection: Connect;

    constructor() {
      super();
    }
}
Finally, go to the file home.template.ts and import the required components. Then, add a constant holding the Position columns, and some <div>s to format the final HTML.
import {html, repeat, when, ref} from '@microsoft/fast-element';
import type {Home} from './home';
import { tradeFormCreateSchema, tradeFormUpdateSchema } from './schemas';

export const positionsColumnDefs: any[] = [
    {field: 'POSITION_ID', headerName: 'Id'},
    {field: 'INSTRUMENT_ID', headerName: 'Instrument'},
    {field: 'QUANTITY', headerName: 'Quantity'},
    {field: 'NOTIONAL', headerName: 'Notional'},
    {field: 'VALUE', headerName: 'Value'},
    {field: 'PNL', headerName: 'Pnl'},
];

export const HomeTemplate = html<Home>`
<div class="split-layout">
    <div class="top-layout">
        <entity-management
          resourceName="ALL_TRADES"
          title = "Trades"
          entityLabel="Trades"
          createEvent = "EVENT_TRADE_INSERT"
          updateEvent = "EVENT_TRADE_MODIFY"
          deleteEvent = "EVENT_TRADE_CANCELLED"
          :columns=${x => x.columns}
          :createFormUiSchema=${() => tradeFormCreateSchema}
          :updateFormUiSchema=${() => tradeFormUpdateSchema}
        ></entity-management>
    </div>
    <div class="top-layout">
        <zero-card class="positions-card">
            <span class="card-title">Positions</span>
            <zero-grid-pro ${ref('positionsGrid')} rowHeight="45" only-template-col-defs>
                ${when(x => x.connection.isConnected, html`
                  <grid-pro-genesis-datasource resource-name="ALL_POSITIONS"></grid-pro-genesis-datasource>
                  ${repeat(() => positionsColumnDefs, html`
                    <grid-pro-column :definition="${x => x}" />
                  `)}
                `)}
            </zero-grid-pro>
        </zero-card>
    </div>
</div>
`;
Exercise 3.3: data grids
15 mins
Change the Position constant to delete the POSITION_ID, as this field does not have to be in the grid. Change some CSS parameters to improve your application's look and feel.
Don't forget to reload the client side to see the upgrades.
This is the end of the day 3 of our training. To help your training journey, check out how your application should look at the end of day 3 here.